How to analyze plastics from a surface trawl
This guide will walk you through how to remove and process plastics from surface trawls.
This guide will walk you through how to remove and process plastics from surface trawls.
You can download this guide for analysing trawl samples here.

Materials
- Trawl net (from any of our trawls) or sample jar with sample
- Spaghetti strainer (as fine as possible)
- Coffee filter
- Tray or pan (we use Pyrex casserole)
- Permanent marker or pen
- Tweezers
- A sink or running water (any temperature)
Set out all your supplies ahead of time and make sure they are clean.
Make sure the work area is clear of breezes, fleece (which might contaminate your sample!), and dirt.
Removing microplastics from the net
This protocol assumes that you’ve used our BabyLegs trawl and have put the tights in a bag for later analysis. However, if you’ve saved cod ends from our LADI trawl, or even if you are doing this in the field to move samples from the trawl into sample jars for later processing, the method is the same.

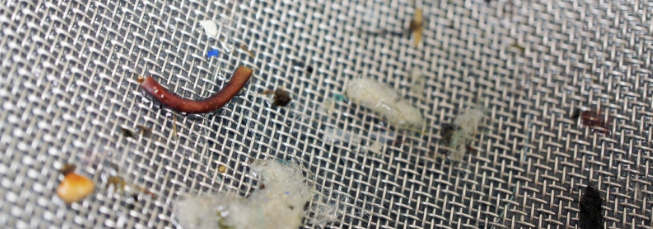
- Over the tray/pan, flip your trawl net inside out to see if you have any plastics inside. The tray is to catch any plastics that fall out.
- If you see plastics immediately, you can pick them out with the tweezers and put them in the coffee filter. When you’ve picked out everything you think is plastic, go to the next step. Make sure you haven’t left any plastics behind in the tray! Always work over the tray whenever you can. Plastics often escape during study when they fall, are disturbed by a breeze or your breathing, or through static electricity!
- Put the strainer in a sink. Over the strainer, turn the net inside out or upside down (depending on the trawl design).
- Gently rinse water through the net and into the strainer in the sink. Do this in the opposite direction of how water flowed in.
The plastics and other organic matter will fall into the strainer. Avoid splashing, as you might lose plastics!

- Using tweezers, pick out any plastics you see in the strainer. Make sure the strainer is well lit. To help us see plastics, we move the strainer around, and continue to let water move over it, as plastics move differently in water flows than other materials. To make sure you have all the plastic out of the strainer, turn the strainer upside down and wash it into the pan. Sometimes you’ll see an extra floating plastic that you missed in the strainer!
- Put the plastic items on the coffee filter. If you have more than one trawl sample, label the coffee filter.
- When you have all the items in the filter, fold the filter and put it upright in a cup to dry overnight. The items will dry in the filter and you will be able to see if they are plastic more easily, as some organic matter will dry and become brittle.

See our Spotter’s Guide for determining if what you’ve picked out is plastic! You’ll need a microscope to help determine plastics from non-plastics.

Amendments and hacks
Since these are do-it-yourself tools, often people will use them in ways and conditions that we don’t cover here. That’s great, and is what advancing knowledge is all about! Here are some trouble shoots if you are using things a little differently. Also, if you do something we don’t anticipate, we would love to hear from you!
Other trawls: This guide showed BabyLegs, but the same process is used for Ice Cream Scoop, and even LADI trawls and Manta trawls on research ships. Basically, find a way to keep the sample stable (bag it, etc.) until you get to clean running water, then rinse the sample into a strainer. The rest is identical.
In the field: Sometimes you want to sample all day and have multiple samples, instead of taking each sample into the kitchen or lab to process. In that case, you can try using a hose or jugs of water in the field and rise into a jar instead of a sieve (in the lab/kitchen you then pout the jars into the strainer); or you can have multiple pairs of baby tights for BabyLegs/meshes for Ice Cream Scoop and bag each one. We do not recommend trying to sort plastics from non-plastics in the field! It takes forever and you can easily make mistakes in the wind and uncontrolled conditions.
It’s full of gunk!: If the water where you are working is full of organic debris, the trawl can get clogged quickly. We recommend *not* trawling in swampy surface waters at all. If the trawl turns green, you’ve strained a bunch of algae! You can launder or wash your net and use it again.
Visually identifying plastics
There is only so much you can do with the naked eye. If you are going to do studies regularly, we recommend investing in a dissecting microscope. These scopes have a lot of room between the lens and the stage, unlike compound microscopes, so you can investigate thick plastics. Also, you’ll need reflected light (light from above) as well as the light that is transmitted from below with most microscopes, since plastics aren’t usually transparent.
Also, research has shown that visually identifying plastics is only reliable for plastics 1mm and larger (Song et al. 2015). This isn’t bad– it’s a limitation of a method. All methods have limitations in that they can see some things and not others.
Since identifying plastics from non-plastics is the trickiest part of this kind of work, here are some trick’s we’ve developed:
- Divide your sample into subsamples so you can concentrate on small parts of it
- Allow water to slowly move over the sample– plastics move differently than organics
- Re-float your sample once you think you’re done with it– fill a jar with salt water and put the sample in it, swirl it around, and see if any missed plastics float to the top with the increased salt concentration
- If you have an item and you can’t tell if its plastic or not, try the following:
- Tap it against glass with tweezers– plastics sound different than organics
- Cut it in half and look under the microscope (after you’ve weighed and measured it, if you’re collecting that data)– do differences between the outside and inside tell you if its plastic or not?
- Dry it out for a week and see if it changes shape, size, elasticity, etc. If it does, it’s more likely to be organic
- Heat up a needle over a flame (like a lighter), and touch it to the item. If the item melts, it’s plastic. But not all plastics melt!
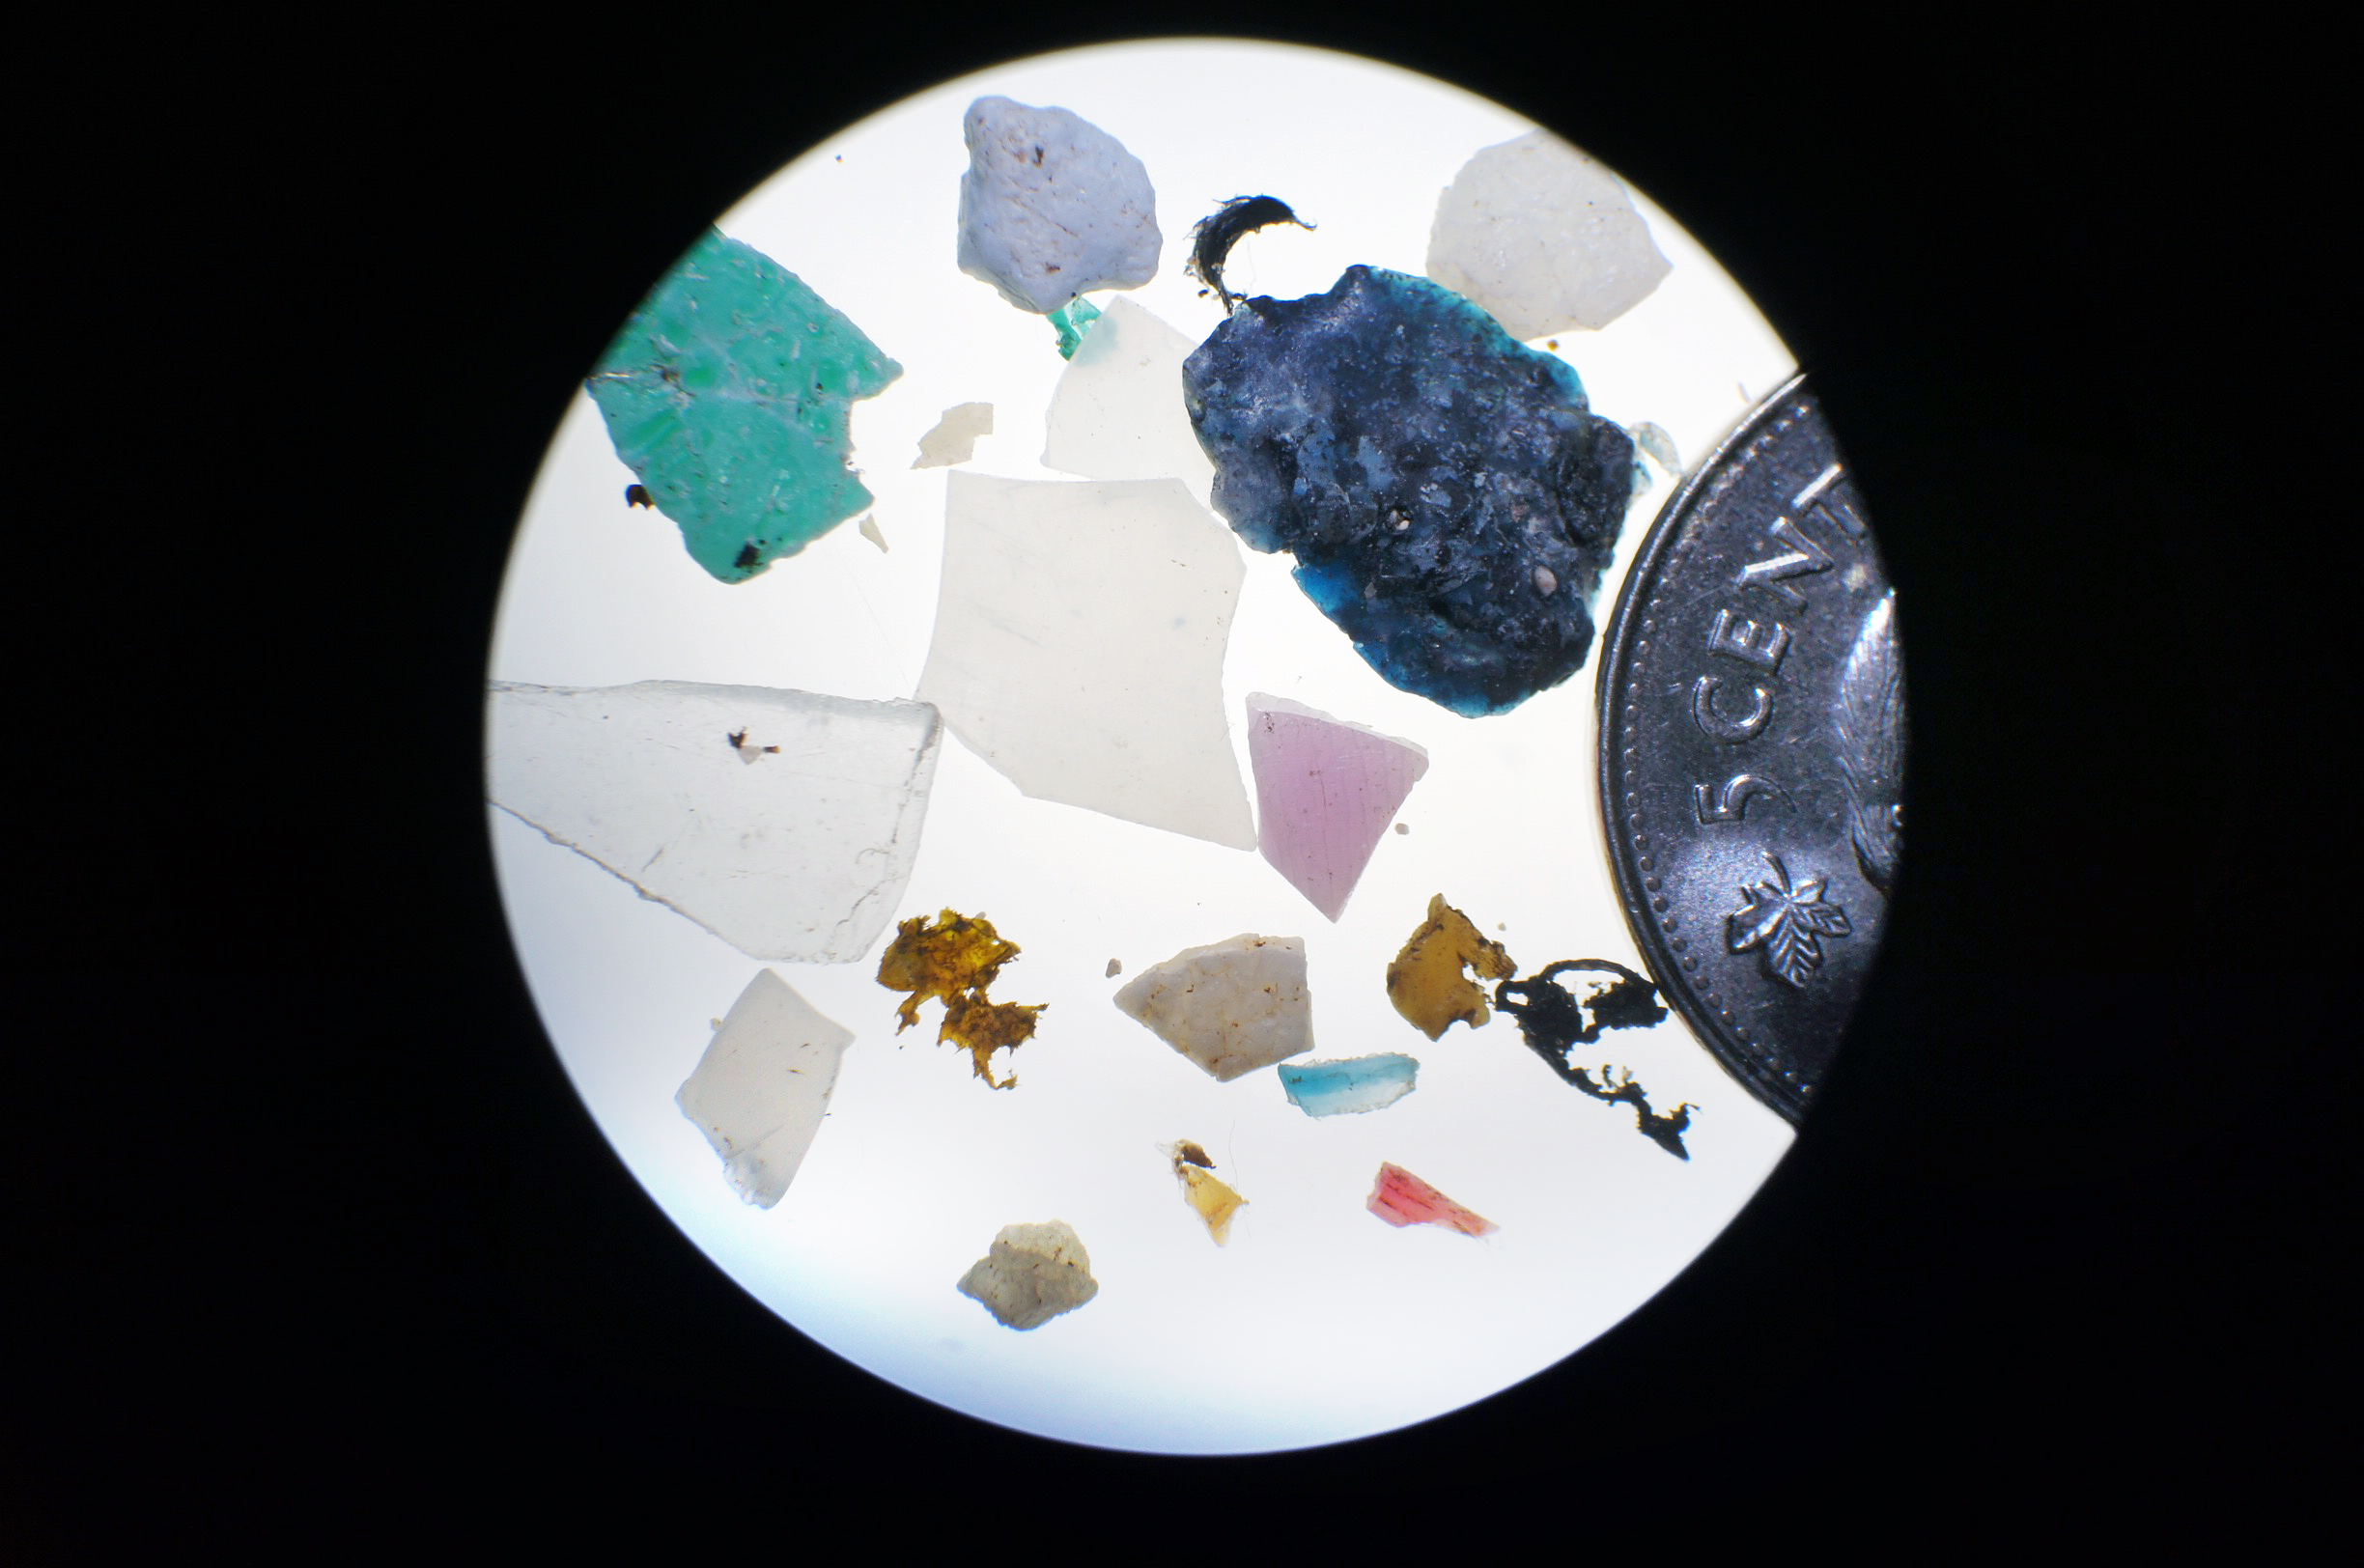
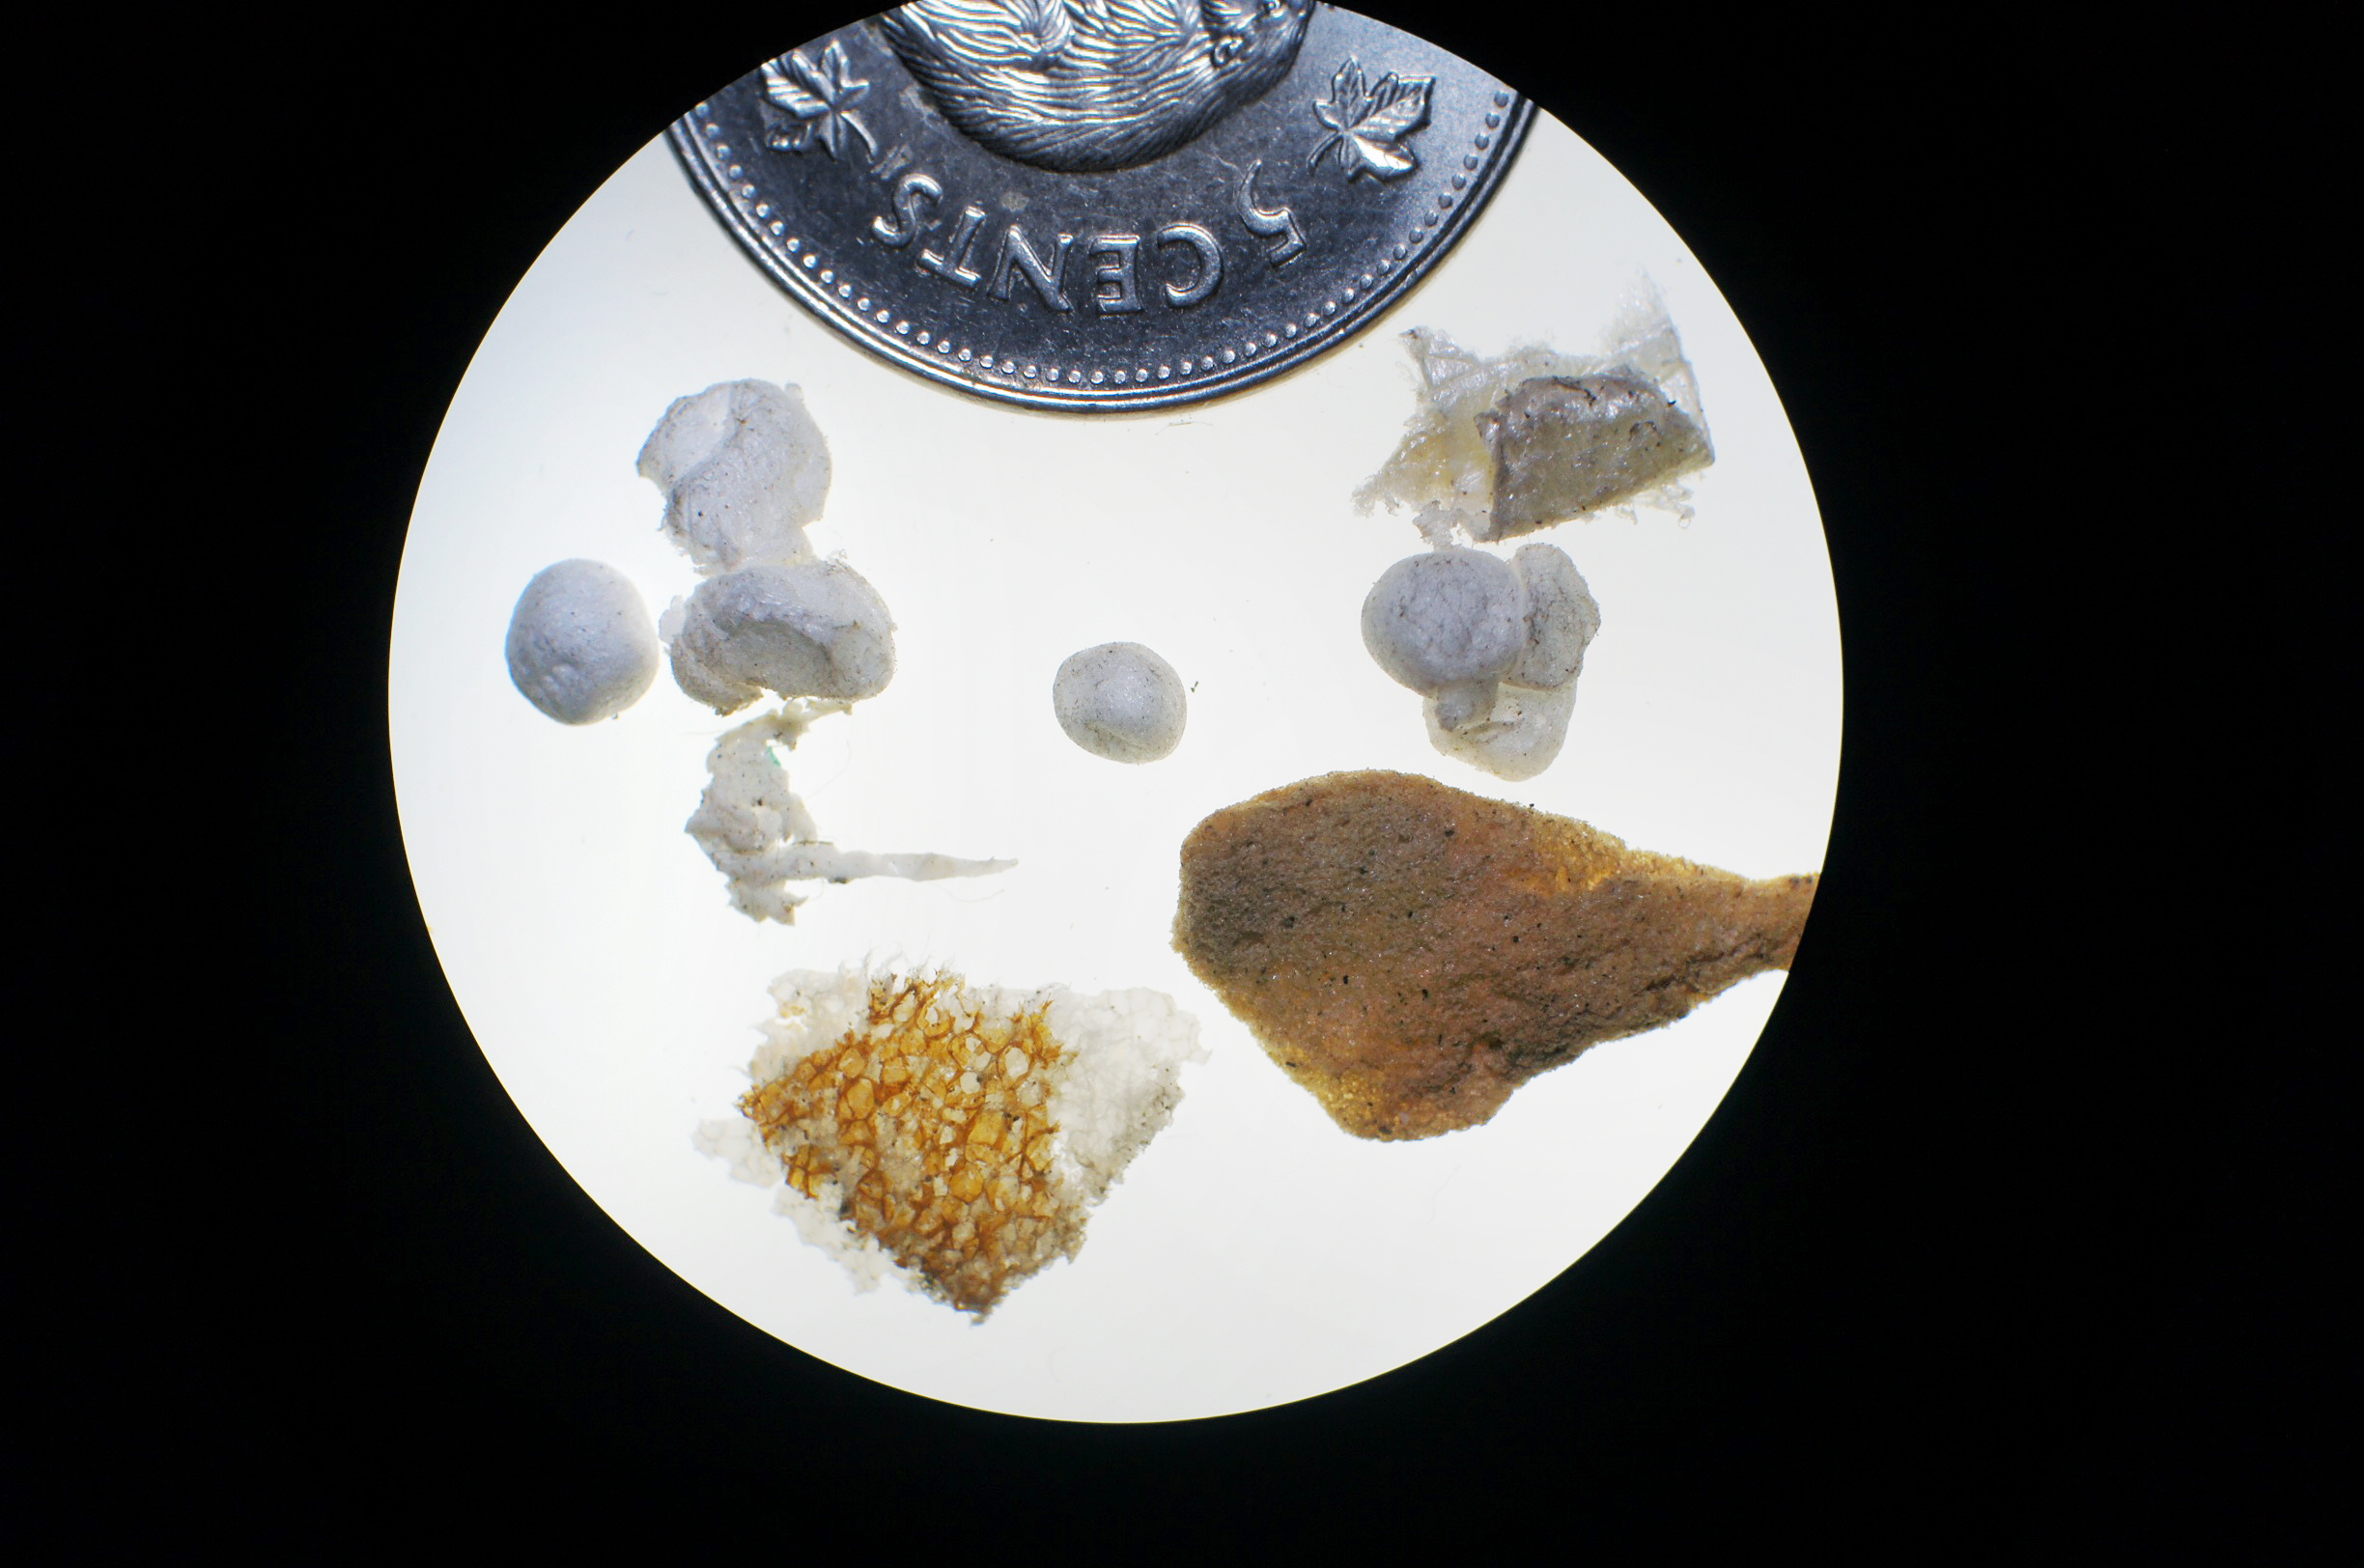
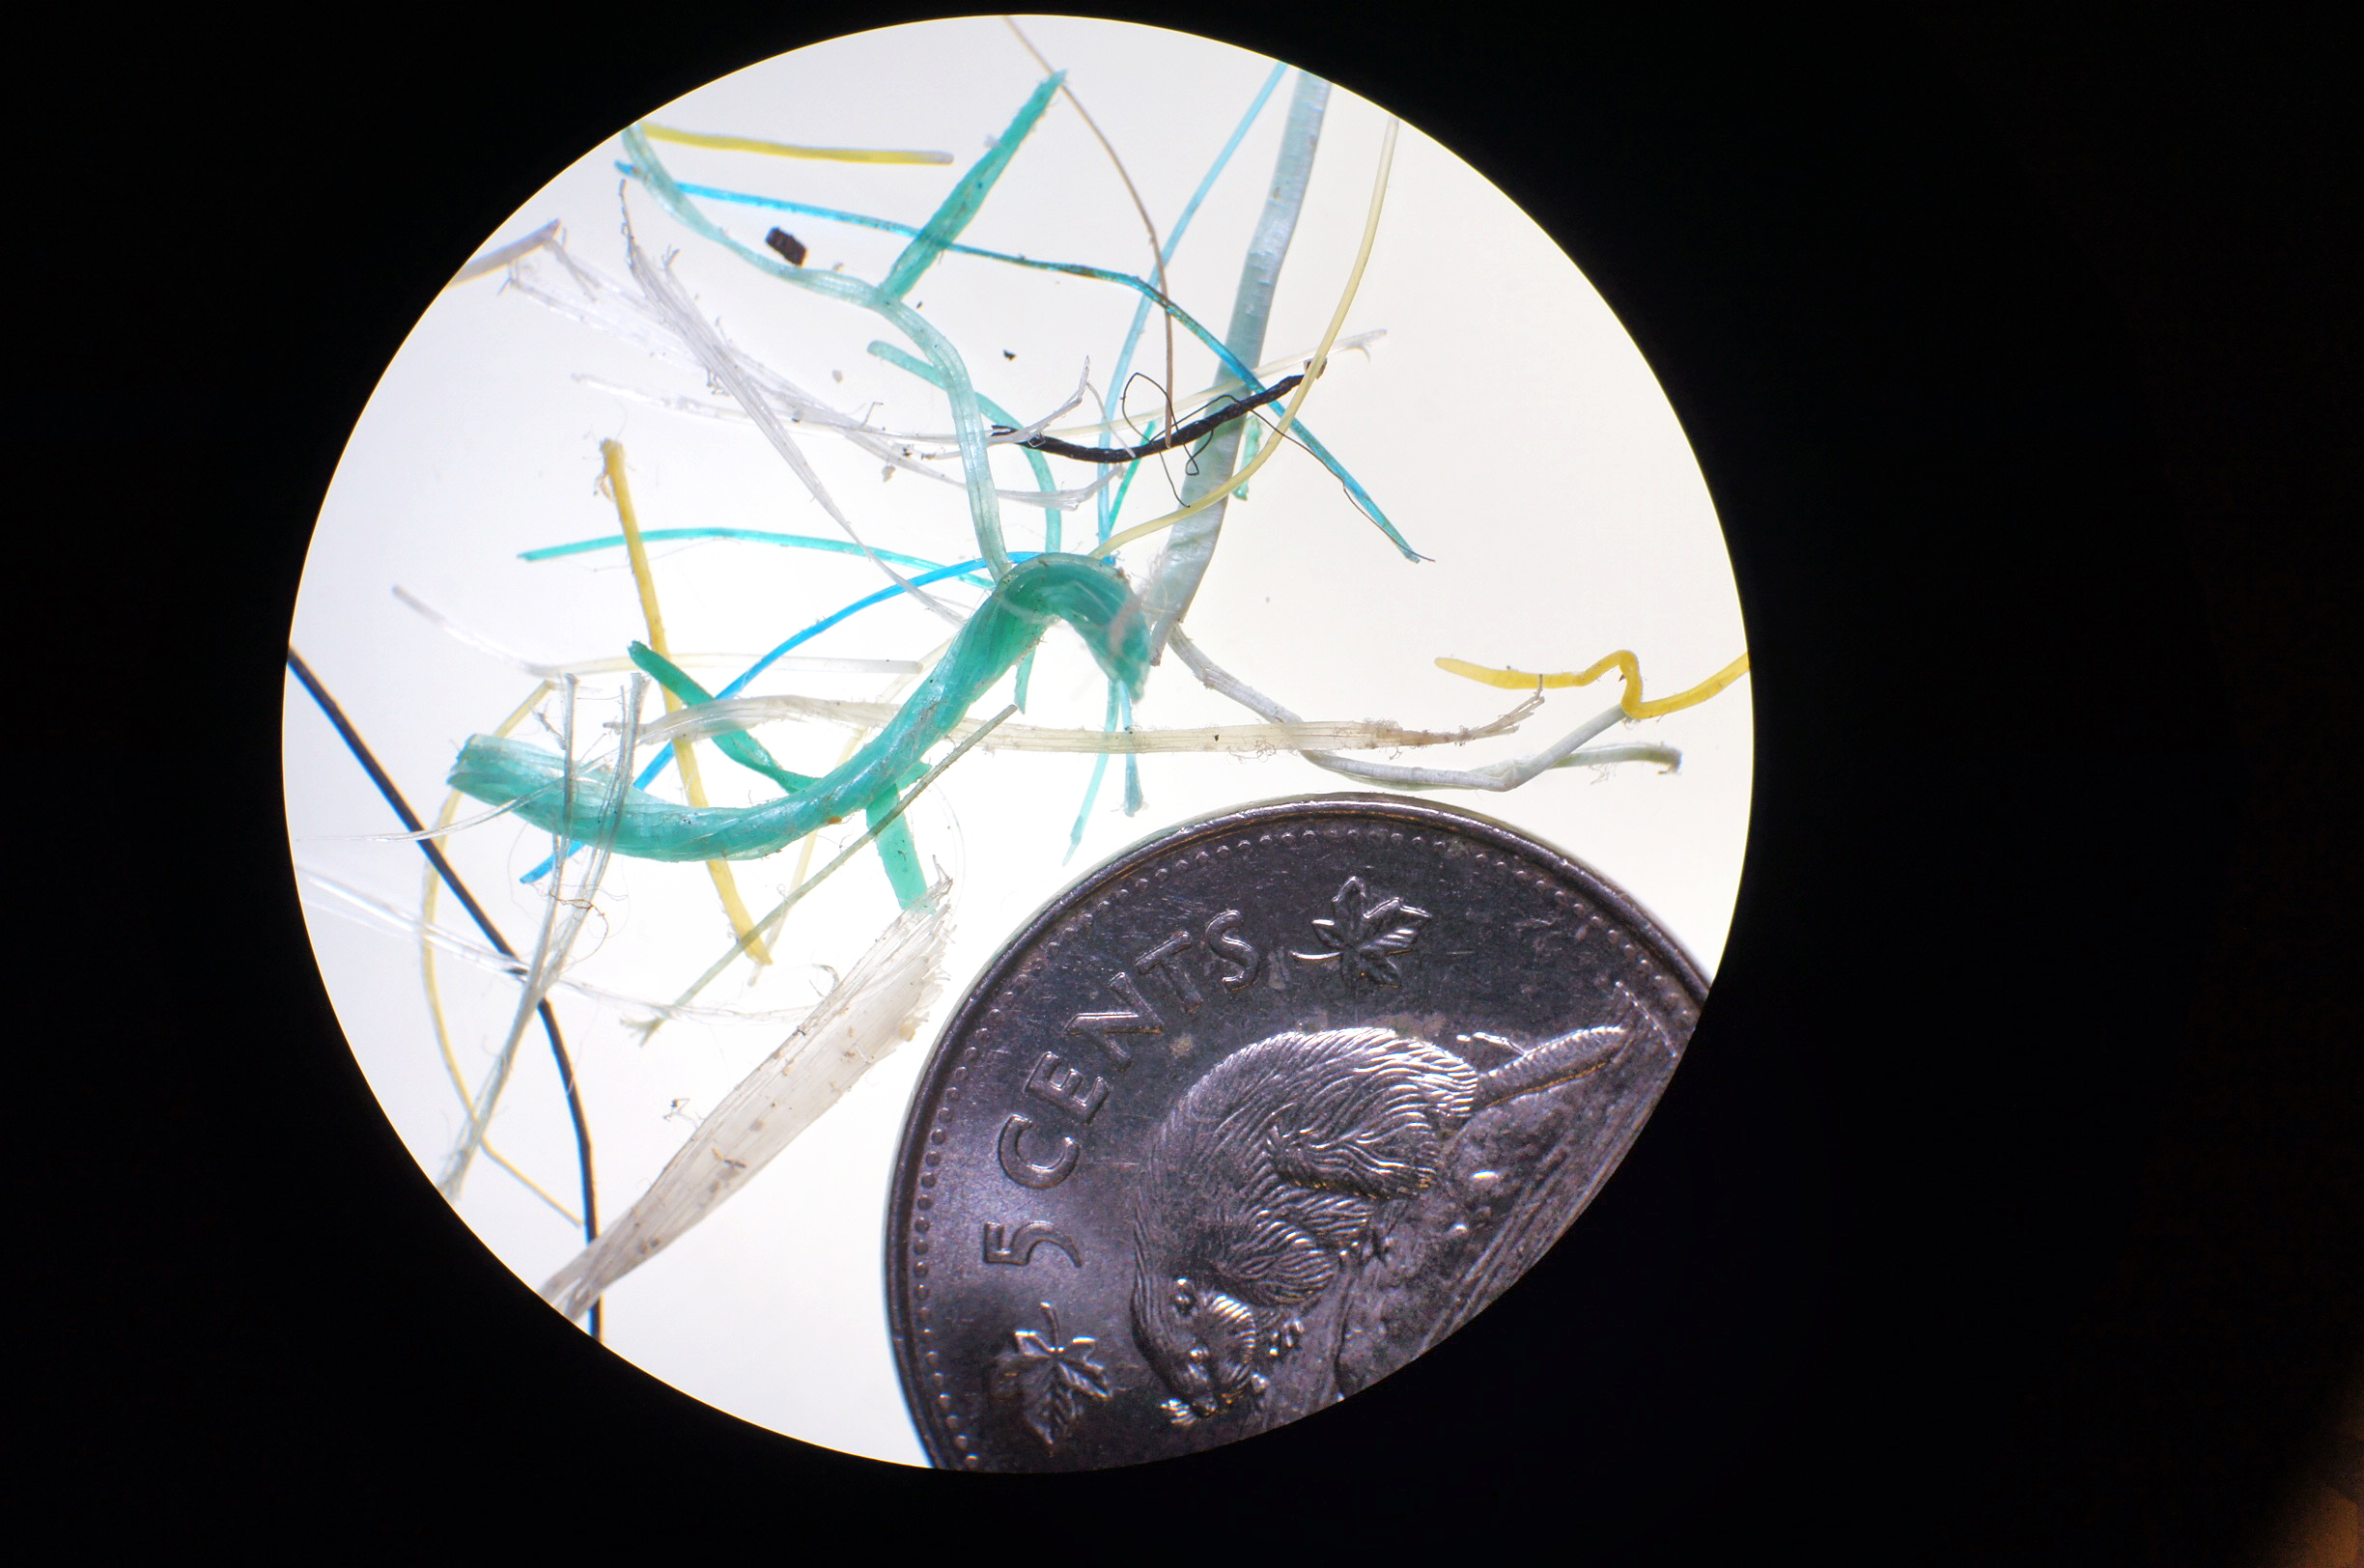
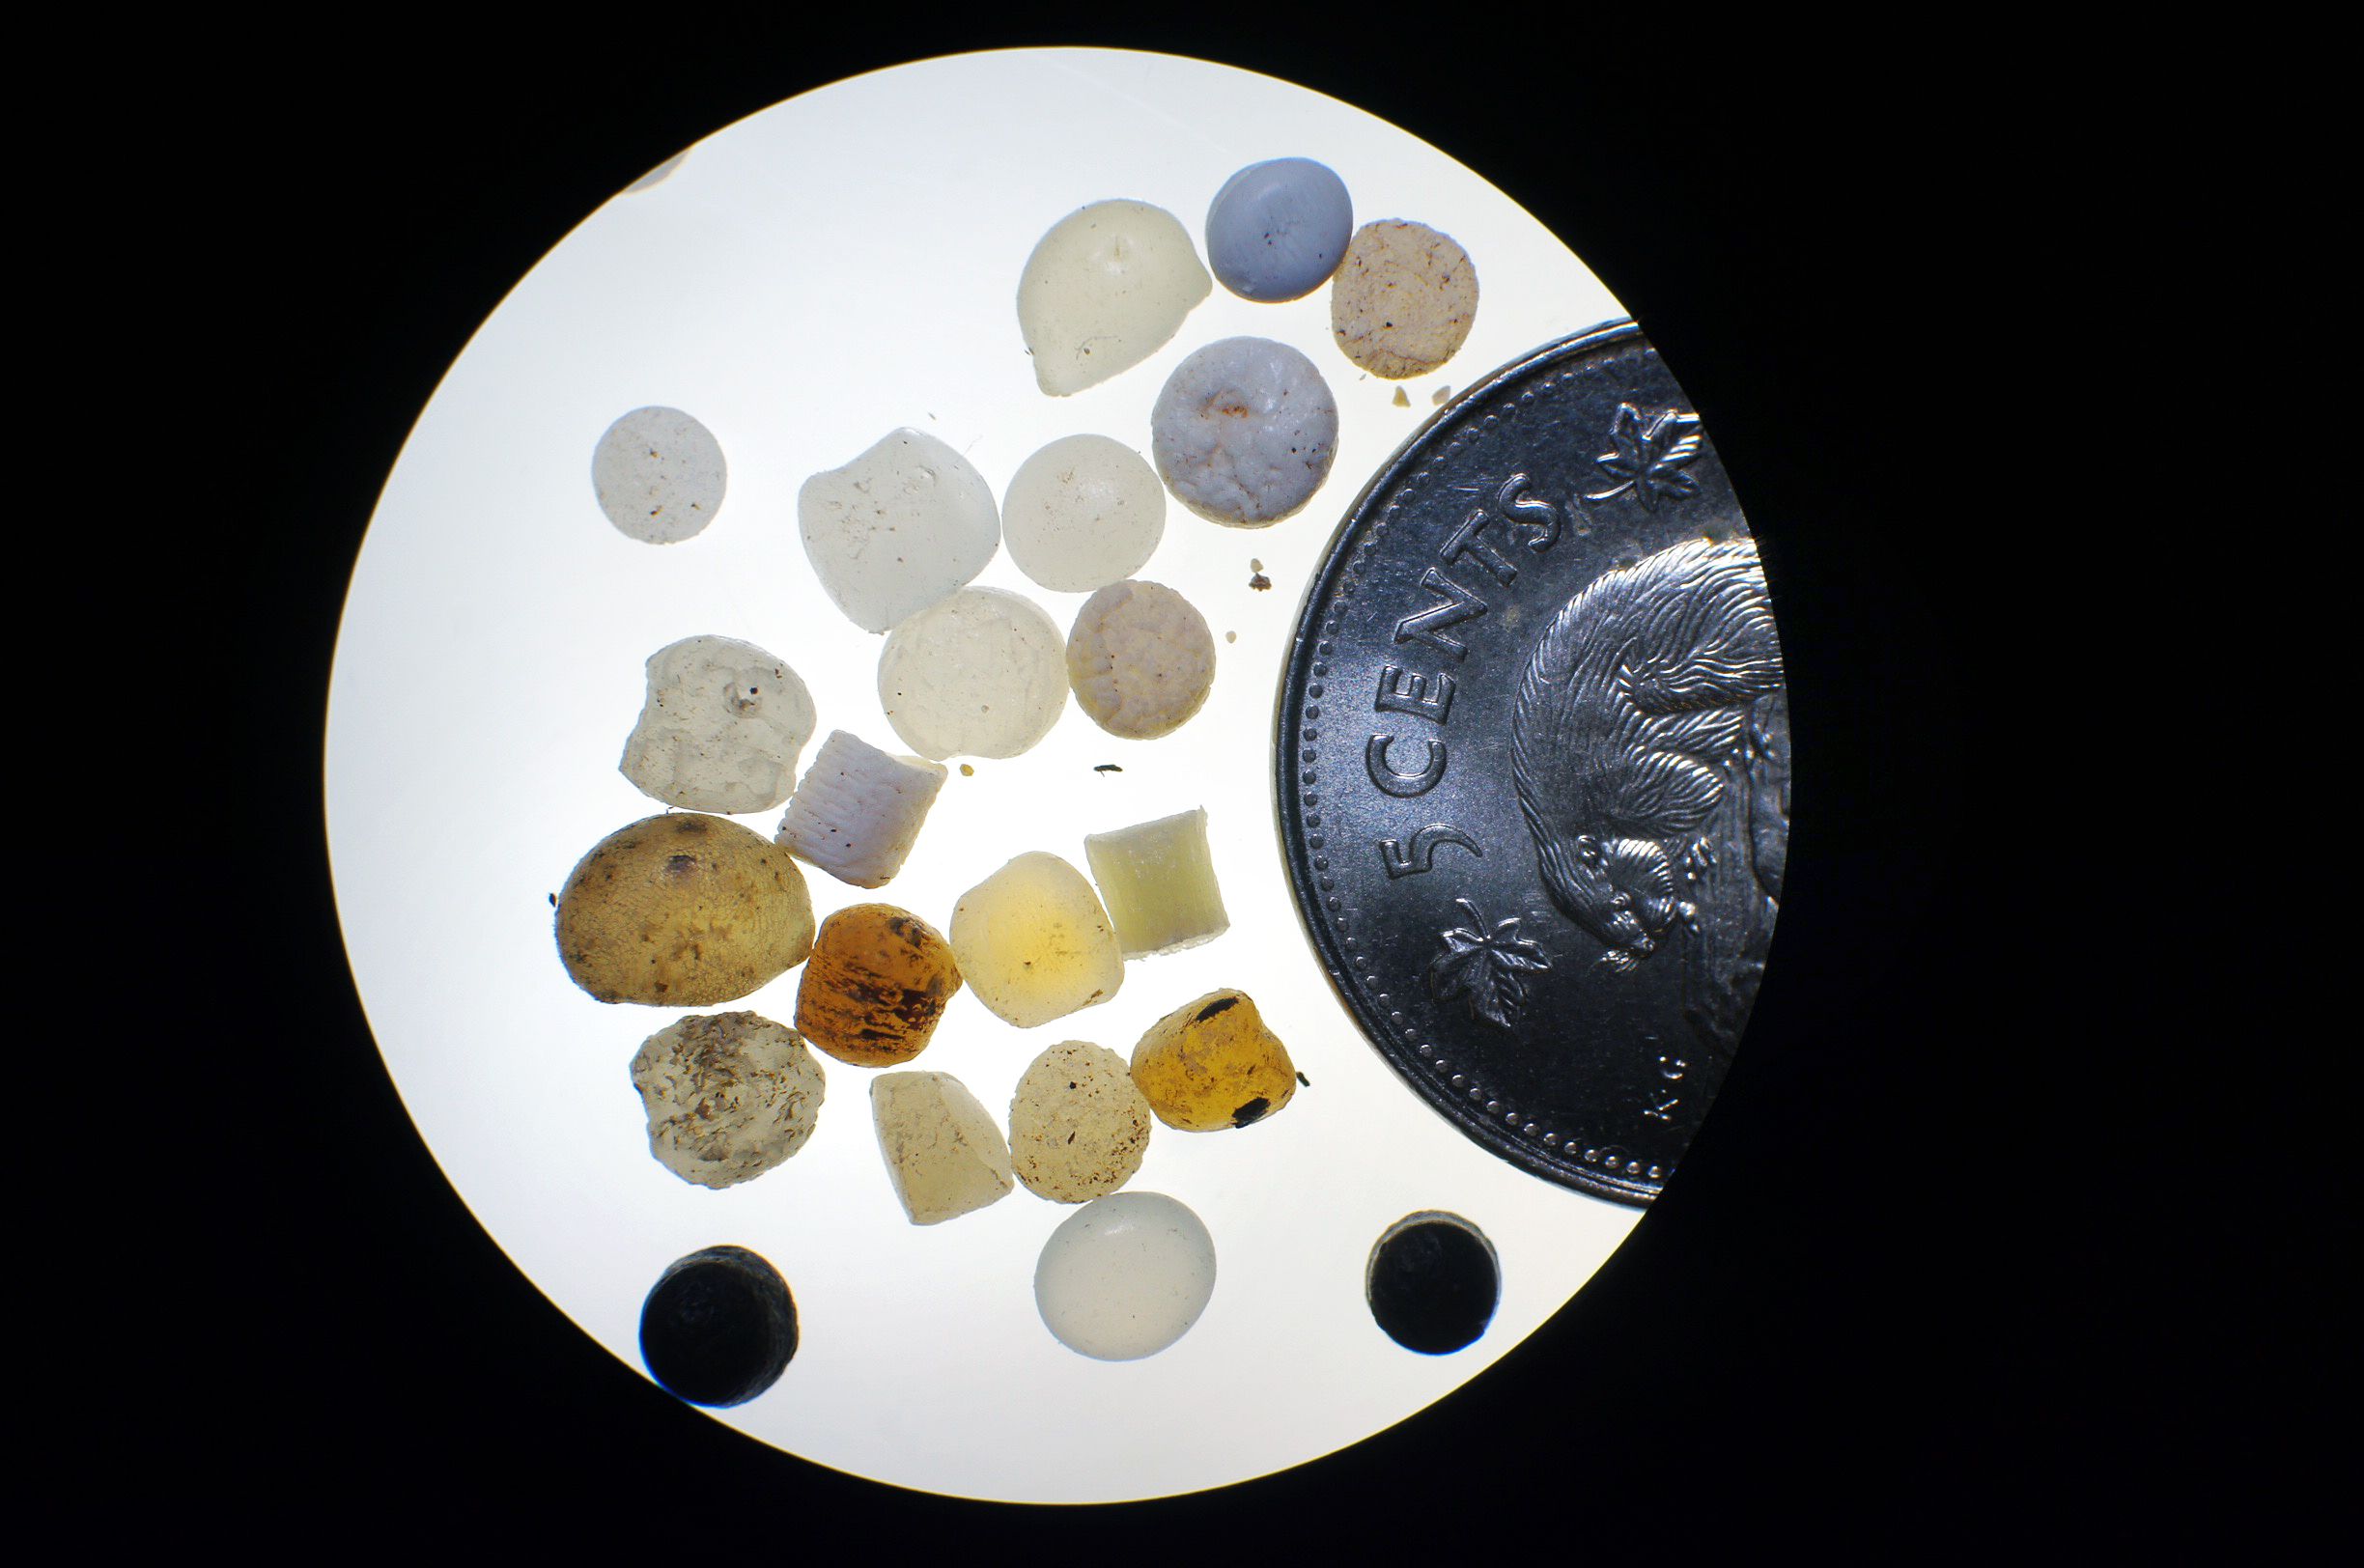
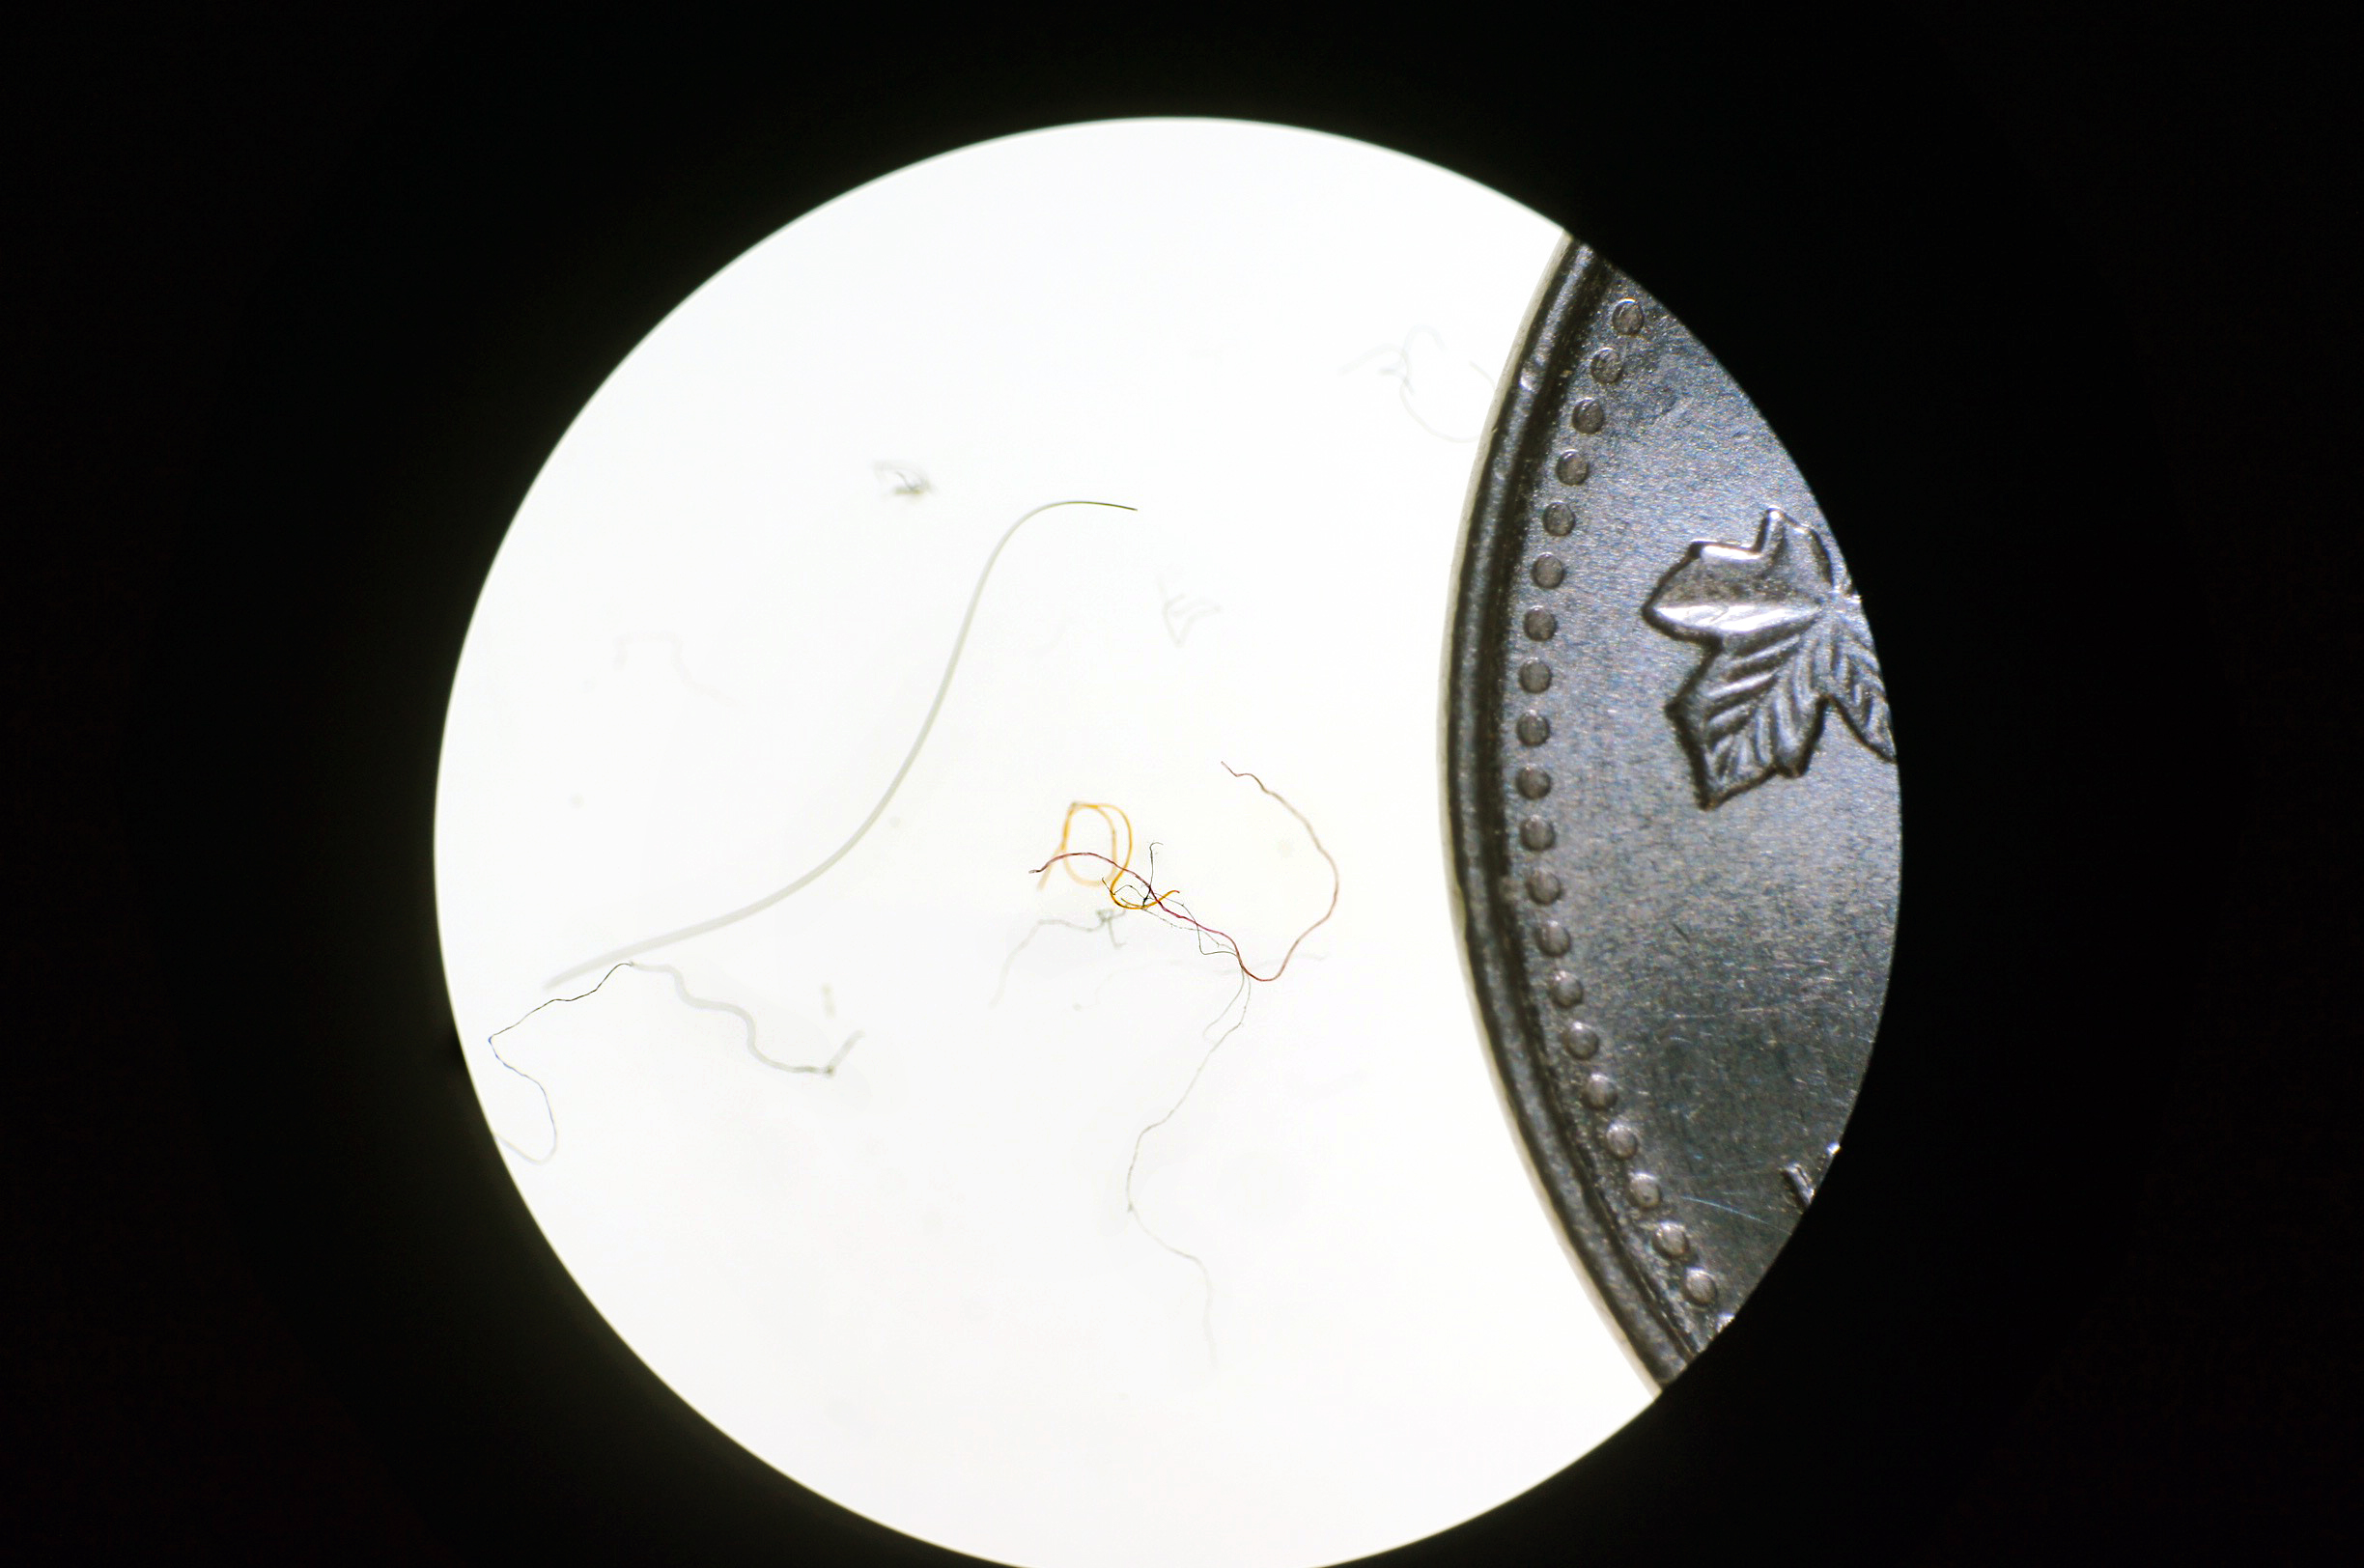
Plastic classifications
Scientific studies will usually weigh the plastics, measure them, and categorize them. The common categories are fragments (bits of hard plastic), film plastic (like bags), foam (like polystyrene), threads (like from fishing gear), industrial pellets (also called nurdles), microbeads (from cosmetics), and microfibers (from synthetic clothing– much thinner and kinkier than threads). The images below can help you identify categories.
Work cited
- Song, Y. K., Hong, S. H., Jang, M., Han, G. M., Rani, M., Lee, J., & Shim, W. J. (2015). A comparison of microscopic and spectroscopic identification methods for analysis of microplastics in environmental samples. Marine pollution bulletin, 93(1), 202-209.