How to use BabyLegs
How to deploy BabyLegs in the water
Created with baby tights, soda pop bottles, and other inexpensive and easy-to-find materials, BabyLegs can be used to skim the surface of the water in rivers, streams, and oceans for floating marine microplastics by hand or from a boat. This instrument is called a surface trawl. Surface trawls are essentially butterfly nets for catching surface plastics. These instructions start with an overview of basic concepts, and then a step-by-step protocol.
Where to trawl
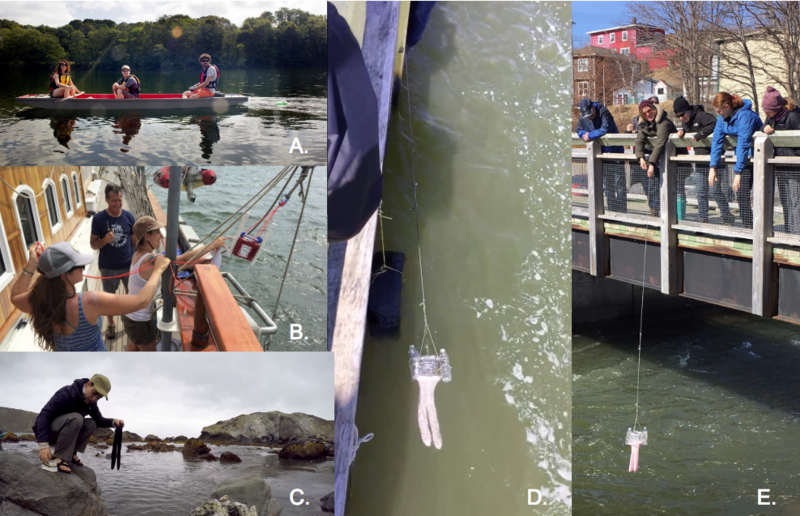
You can use BabyLegs anywhere where there is water and you can get the water to flow through the device. The water must be flowing with enough force to keep the mouth of the trawl pointed in one direction. BabyLegs can “dump” its sample if the water changes direction or stops. Some of the ways people have deployed BabyLegs include:
- Behind a human-powered boat like a canoe, paddle board, or skiff.
- From a motorized boat, which requires a boom keeping the device out of the wake of the boat (which will down-well the plastics).
- By hand in flowing water (or make your own current by swishing it around or leading it)
- Tied off to a wharf on a boom with fast-flowing water.
- Tied off from a bridge or tree branch with fast-flowing water beneath.
Positioning BabyLegs in the water
No matter where you use BabyLegs, a main issue is to make sure the mouth of the container stays at the surface of the water at all times, so most of the mouth is underwater, and a small amount is above water. This ensures the surface of the water, where most buoyant plastics are, is always entering the container. If the trawl dives or twists, adjust your ropes. If it skips along the top of the water, slow down.
Keep BabyLegs out of wake, turbulence, or disrupted water flow. Turbulence “down wells” plastic, pushing them deeper in the water column. If you’re tying BabyLegs to a wharf or bridge, ensure she doesn’t bump against anything or end up in an eddy. From a boat, keep BabyLegs out of the wake. We recommend using an extending arm to pull her alongside a vessel rather than behind it.
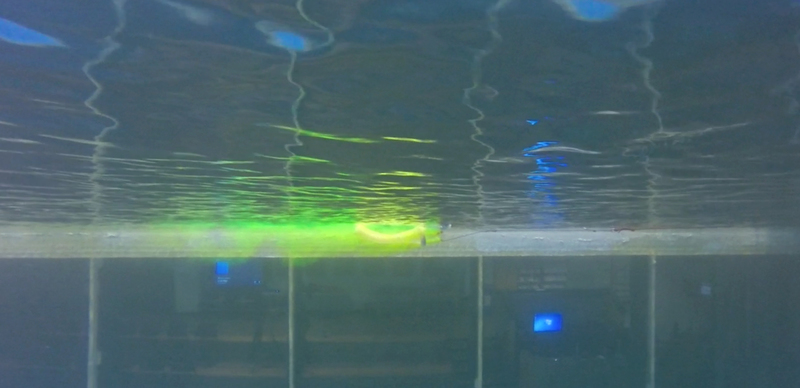
Water should always be running through BabyLegs, not “choking up” or flowing out again. Otherwise, you’ll lose plastics. This is especially important when you are taking BabyLegs out of the water or changing direction (if you are in a boat or doing things by hand). This image shows dye moving through BabyLegs without flowing back out of the mouth. The image was taken during a validation in a flume tank.
How long to leave BabyLegs in the water?
Timing will vary, though we do not recommend trawling for less than half an hour if you want to get a good sample. If the water is particularly swampy or full of debris, we do not recommend sampling with a trawl at all, as it will be extremely time-consuming to separate plastics from organics.
How fast can BabyLegs go?
It depends on how strong your build is. We have found that BabyLegs (Ketchup Container version) can easily handle up to 5 knots of speed in semi-choppy waves for over an hour. In high speeds, attach a “leash” to BabyLegs– an extra line that does not take any pressure and is tied to the boat directly. If your pole breaks or the main line malfunctions, you can use the leash to keep the device from being lost at sea, or being sucked under the boat.
Step-by-step instructions for trawling from a boat
Materials:
- BabyLegs (see build instructions here)
- nutdriver or screwdriver for plumber’s clamp
- rope for the tow line (have more than you need; you can always coil what you don’t want)
- rope for a leash as an extra safety line
- large ziplock bag (big enough for the tights)
Optional if you are doing a study with multiple sites or samples and want more scientific data:
- *GPS device, either handheld or on your phone.
- *hydrogen peroxide (from the drug store– a small bottle is fine)
- *Extra tights, one per sample
- *permanent markers
- *pencil
- *petri dish or shallow jar with lid
- *double sided tape
- * extra ziplocks (one per pair of tights)
- *log sheet for data, ideally on waterproof paper, but if not then copied with toner rather than ink. If not, stay dry! A link to a sample log sheet is here: Trawling_Field_Notebook.docx
Preparing the trawl
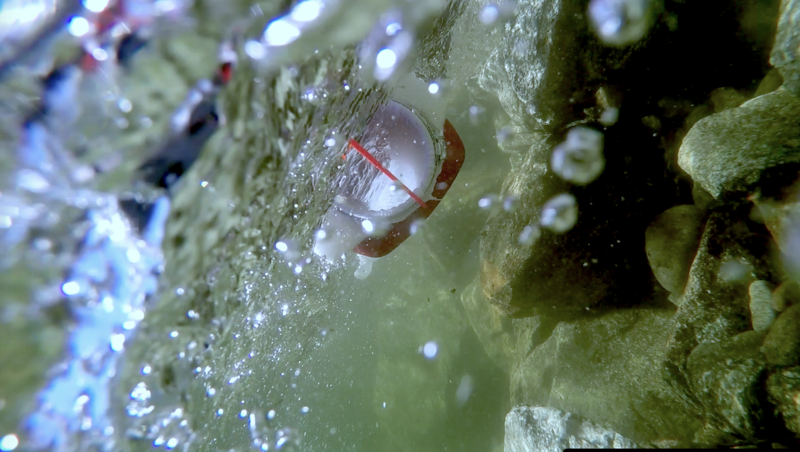
- Attach the leash: Before the boat starts, attach a leash to the trawl. Tie the leash to the side of the boat, bridge, shoreline, or a stable thing that is not going to go anywhere. A leash is a thin, non-load-bearing rope (that is strong enough to bear weight if needed). You can use an existing hole or make a new one. The leash ensures the trawl stays with the boat if you hit rough water, if something happens to the main line, or if it looks like the trawl will get sucked into the propeller. It’s also extremely helpful for flipping the trawl over if it turns upside down or gets snagged. In the image below, the red line is the leash. It is attached directly to the boat.
- Secure BabyLegs: Ensure the tights are secure on the body of BabyLegs. Give it some tough love tugs. If you’re worried it will come undone, use two plumber’s clamps (we call this “belt and suspenders”)
- Make a boom: if your boat has a motor (or even if it doesnt!), you’ll want to create a boom or wooden arm to keep BabyLegs out of the wake of the boat. The wake causes plastics to “dive” into the water (down-well) and you’ll undersample. Tie BabyLegs to the end of the boom but keep the trawl in the boat for now. Make sure you have a way to get BabyLegs off the boom and back into the boat, either by having it safely in reach without leaning or using a fisherman’s hook or another device.
- Prepare your control sample: If you are doing a more scientific study, you’ll have to determine which plastics come from the water, and which plastics come from your science. It’s impossible to do a study without plastic materials! Put double-sided tape in your petri dish or shallow jar to capture any plastics that are coming from the air, and be sure to put any examples of rope, fleece or nylon clothing, bits of the plastic containers, paint from the boat, etc in the dish to eliminate from your sample later one.
- Prepare your datasheet: If you are doing a more scientific study, fill out your datasheet as much as possible before you head out. Use pencil, which won’t run or fade if it gets wet.
Dopping BabyLegs
- Slow down: One you’re away from shore and in water that is not overly full of organics, slow the boat down so the water is moving but there is very little pressure on the line.
- Lat/Long: If you’re doing a more scientific study, Record the time, lat/long, etc on the Trawling_Field_Notebook.docx
- Deploy! Drop BabyLegs over the edge and see how it deals with the water. Slowly speed up if you’re able, but this might just be a slow ride. Slowing down solves a lot of problems (twisting, diving, etc). Ensure the mouth of the trawl is catching about 1/3 air, and 2/3 water. The surface of the water should always be in BabyLeg’s mouth. If not, adjust the lines.
- Keep an eye: Pull the trawl for the predetermined amount of time in your sample area. Keep an eye on it, since algae and gunk can fill it up– then you have to stop.
- Prep the bags: If you are doing multiple sites on this trip, label the bags with the trawl tow number and date. Write these in the Trawling_Field_Notebook.docx as well.
Retrieving BabyLegs
- Slow down: Slow down, but make sure you don’t stop or start drifting backwards, which can make the sample float out of the mouth of the trawl.
- Pull BabyLegs out: Pull the trawl out of the water using the main line, not the leash.
- Record lat/long: Record the lat/long for when the trawl comes out of the water in the Trawling_Field_Notebook.docx. Include any other relevant notes as well.
- Bag it and tag it: Using the nutdriver or screwdriver, loosen the plumber’s clamp and remove the tights, making sure not to dump the sample. Put the tights in the pre-labeled plastic bag (if you are doing more than one trawl). If you are concerned about insects, small fish, or other animals being caught in the trawl, gently turn the legs inside out until you can look inside them. Pull out any animals and put them back. The trawl has been tested extensively, and no fish have ever been caught. Insects and neuston invertebrates like plankton or krill can be caught, though.
- Sterilize it: Add a capful of hydrogen peroxide to the bag. Just dump it in. Seal the bag. This will ensure that your sample does not become overly disgusting over time. It will still be a little disgusting, though. We usually freeze our samples if there is going to be more than a 12-hour delay between sampling and processing the sample.
Repeat! If you are conducting another sample, put a new pair of tights on BabyLegs, secure the plumber’s clamp with the nutdriver or screwdriver, and repeat at a new location.