DIY Microplastic forensics
Once you have a plastic sample, how do you analyze the plastics themselves? How do you tell plastics from palstic look-alikes?
One of the main problems of working with microplastics is that they can be difficult to tell apart from non-plastics. In our own lab, beginners can have up to an ~80% error rate where they either fail to identify some things as plastics or identify non-plastics as plastics by mistake. This guide is designed to help reduce that margin of error so you can be more sure of what you’ve found.
This guide assumes you are working with samples from BabyLegs, and have prepared your sample by sorting and drying it, but it can be generalized to microplastics found in other ways.
Materials
- Your microplastic sample, sorted and dried.
- Something to visually magnify the plastics. We use a dissecting microscope (Dissecting scopes are different than compound microscopes, which are more common. Dissecting scopes have a larger working area on the stage (the place where you put the sample) and a lower magnification). If you don’t have one, you can use a handheld/USB microscope (such as these), or even a magnifying glass or an app on your phone. We also have a guide for building your own microscopes.
- A glass or plastic petri dish, watch glass, or other flat, see-through, shallow container to look at your sample under the microscope with.
- Spotter’s Guide to micoplastics, available here: Spotter’s_Guide_to_Plastic_Pollution-_trawls-SM.pdf We’ve prepared this guide with common plastic types and common plastic-look alikes to aid identification.
- Tweezers
- Sewing needle & source of heat (like a lighter)
- Datasheet (if you are collecting data systematically into some kind of data set. No need if you’re just poking around). We have a blank datasheet here.
Considering your possible plastic

First, review the Spotter’s Guide for Plastic Pollution so you can learn some of the common types of microplastics and errors.

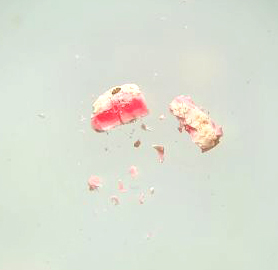
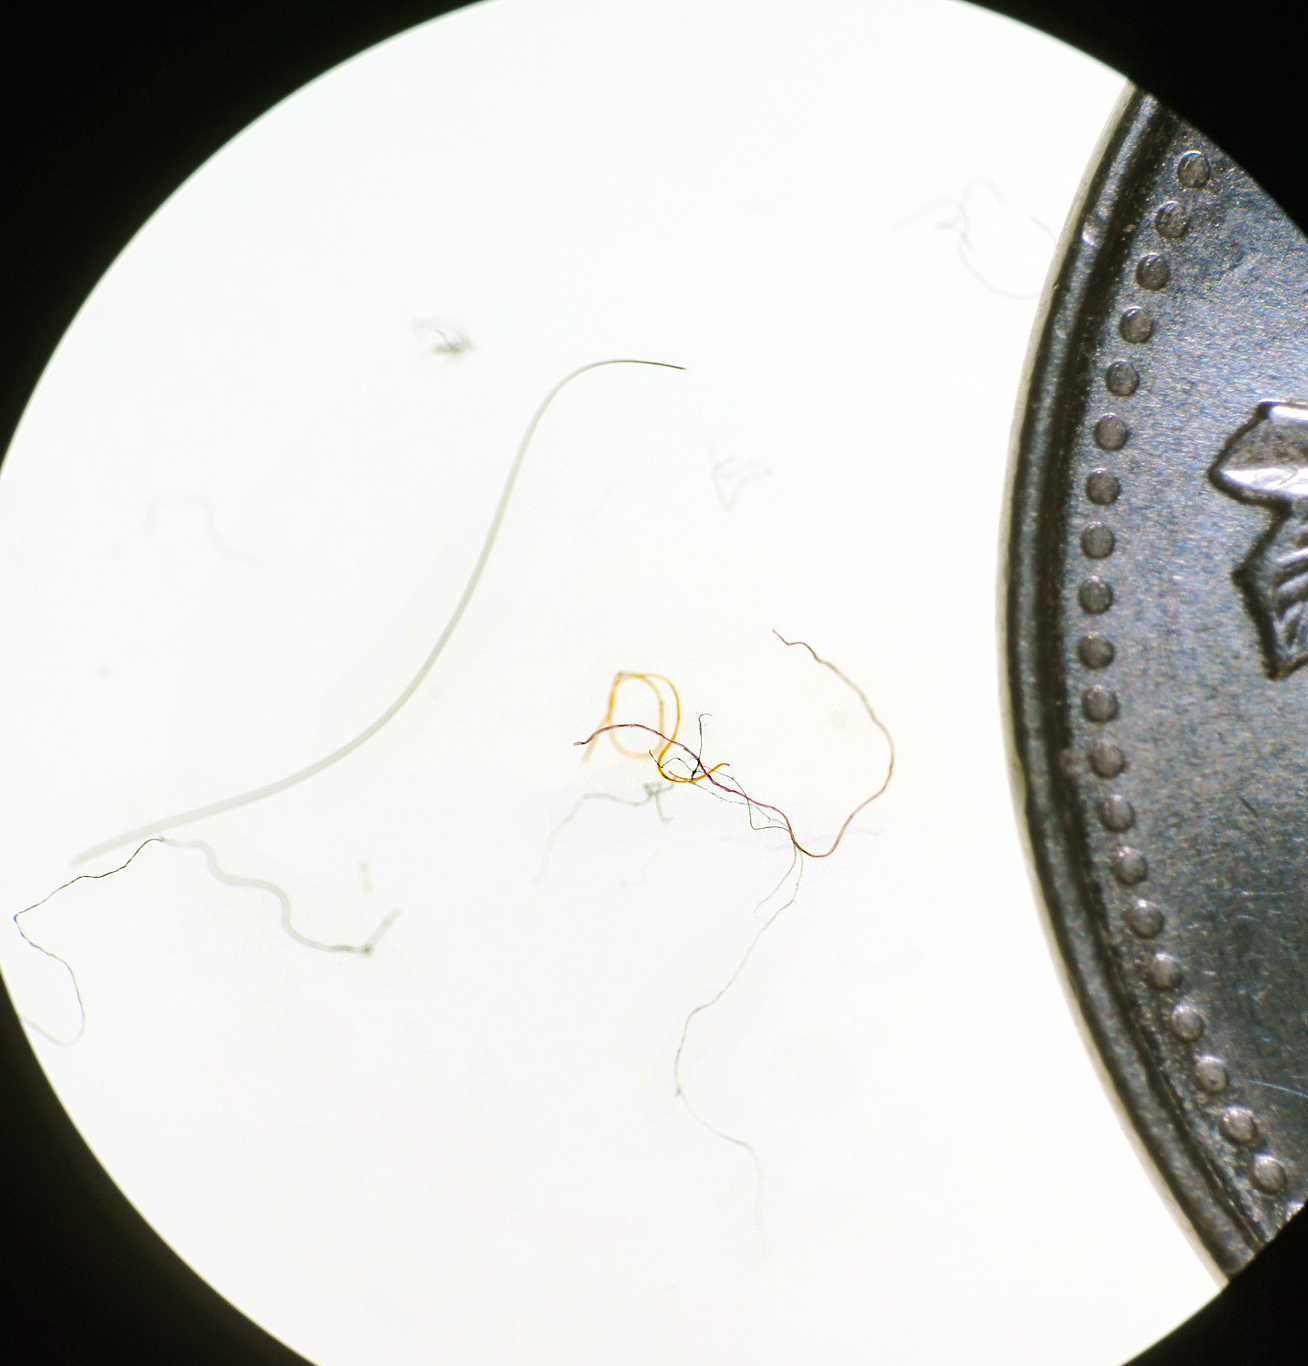
Look at its colour and shape. Some plastics are very easy to identify because of their colour and shape, but be careful! Crab legs, shrimp exoskeletons, and tiny spiders can be bright red (like the photo to the left). There are also different forms (called morphologies of plastics) that are easy to identify. See below for a lesson on each morphology.
Compare it to other things. When you look at the plastic, compare it to other things in the sample, especially things you’ve already identified as organics or non-plastics. If you see a larger part of an exoskeleton, when you see a smaller fragment of one, you’ll be able to identify it as part of an insect rather than a plastic. If you think it might be paper, go get some paper and compare it (the image to the left is paper!). If you think it might be a spider leg, go get a spider leg (ideally from a dead spider elsewhere in your sample!) and compare it.
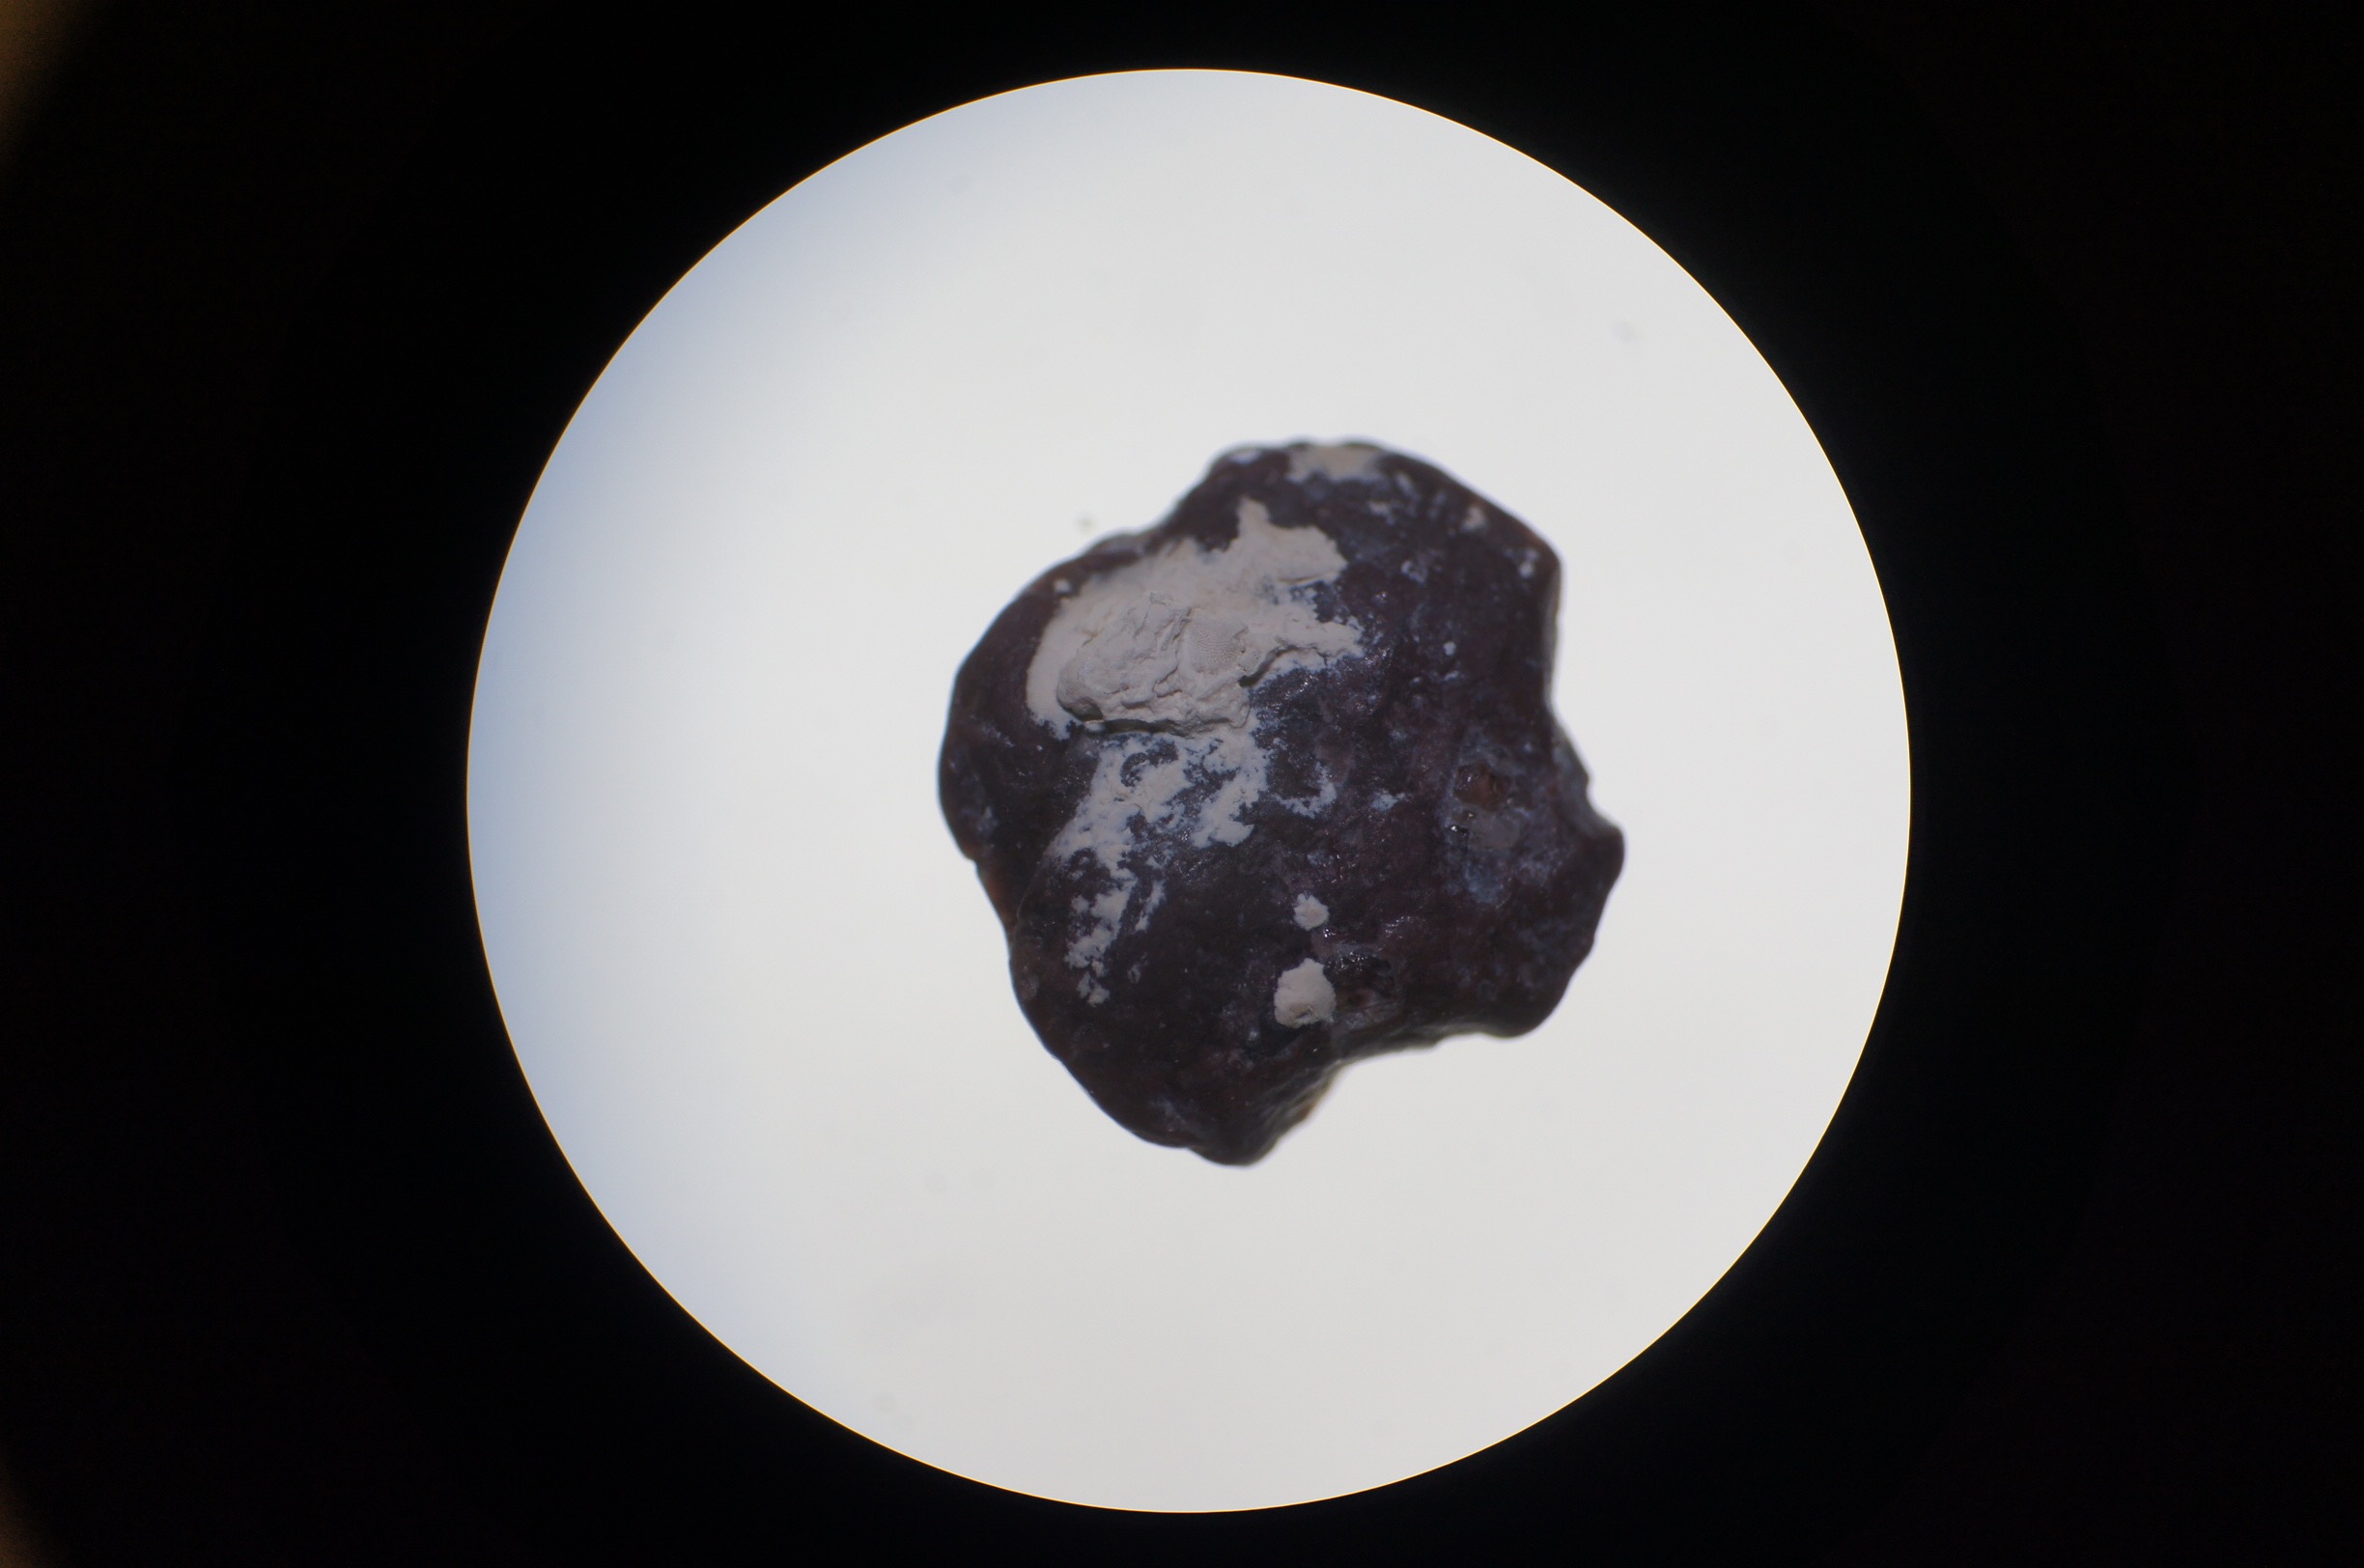
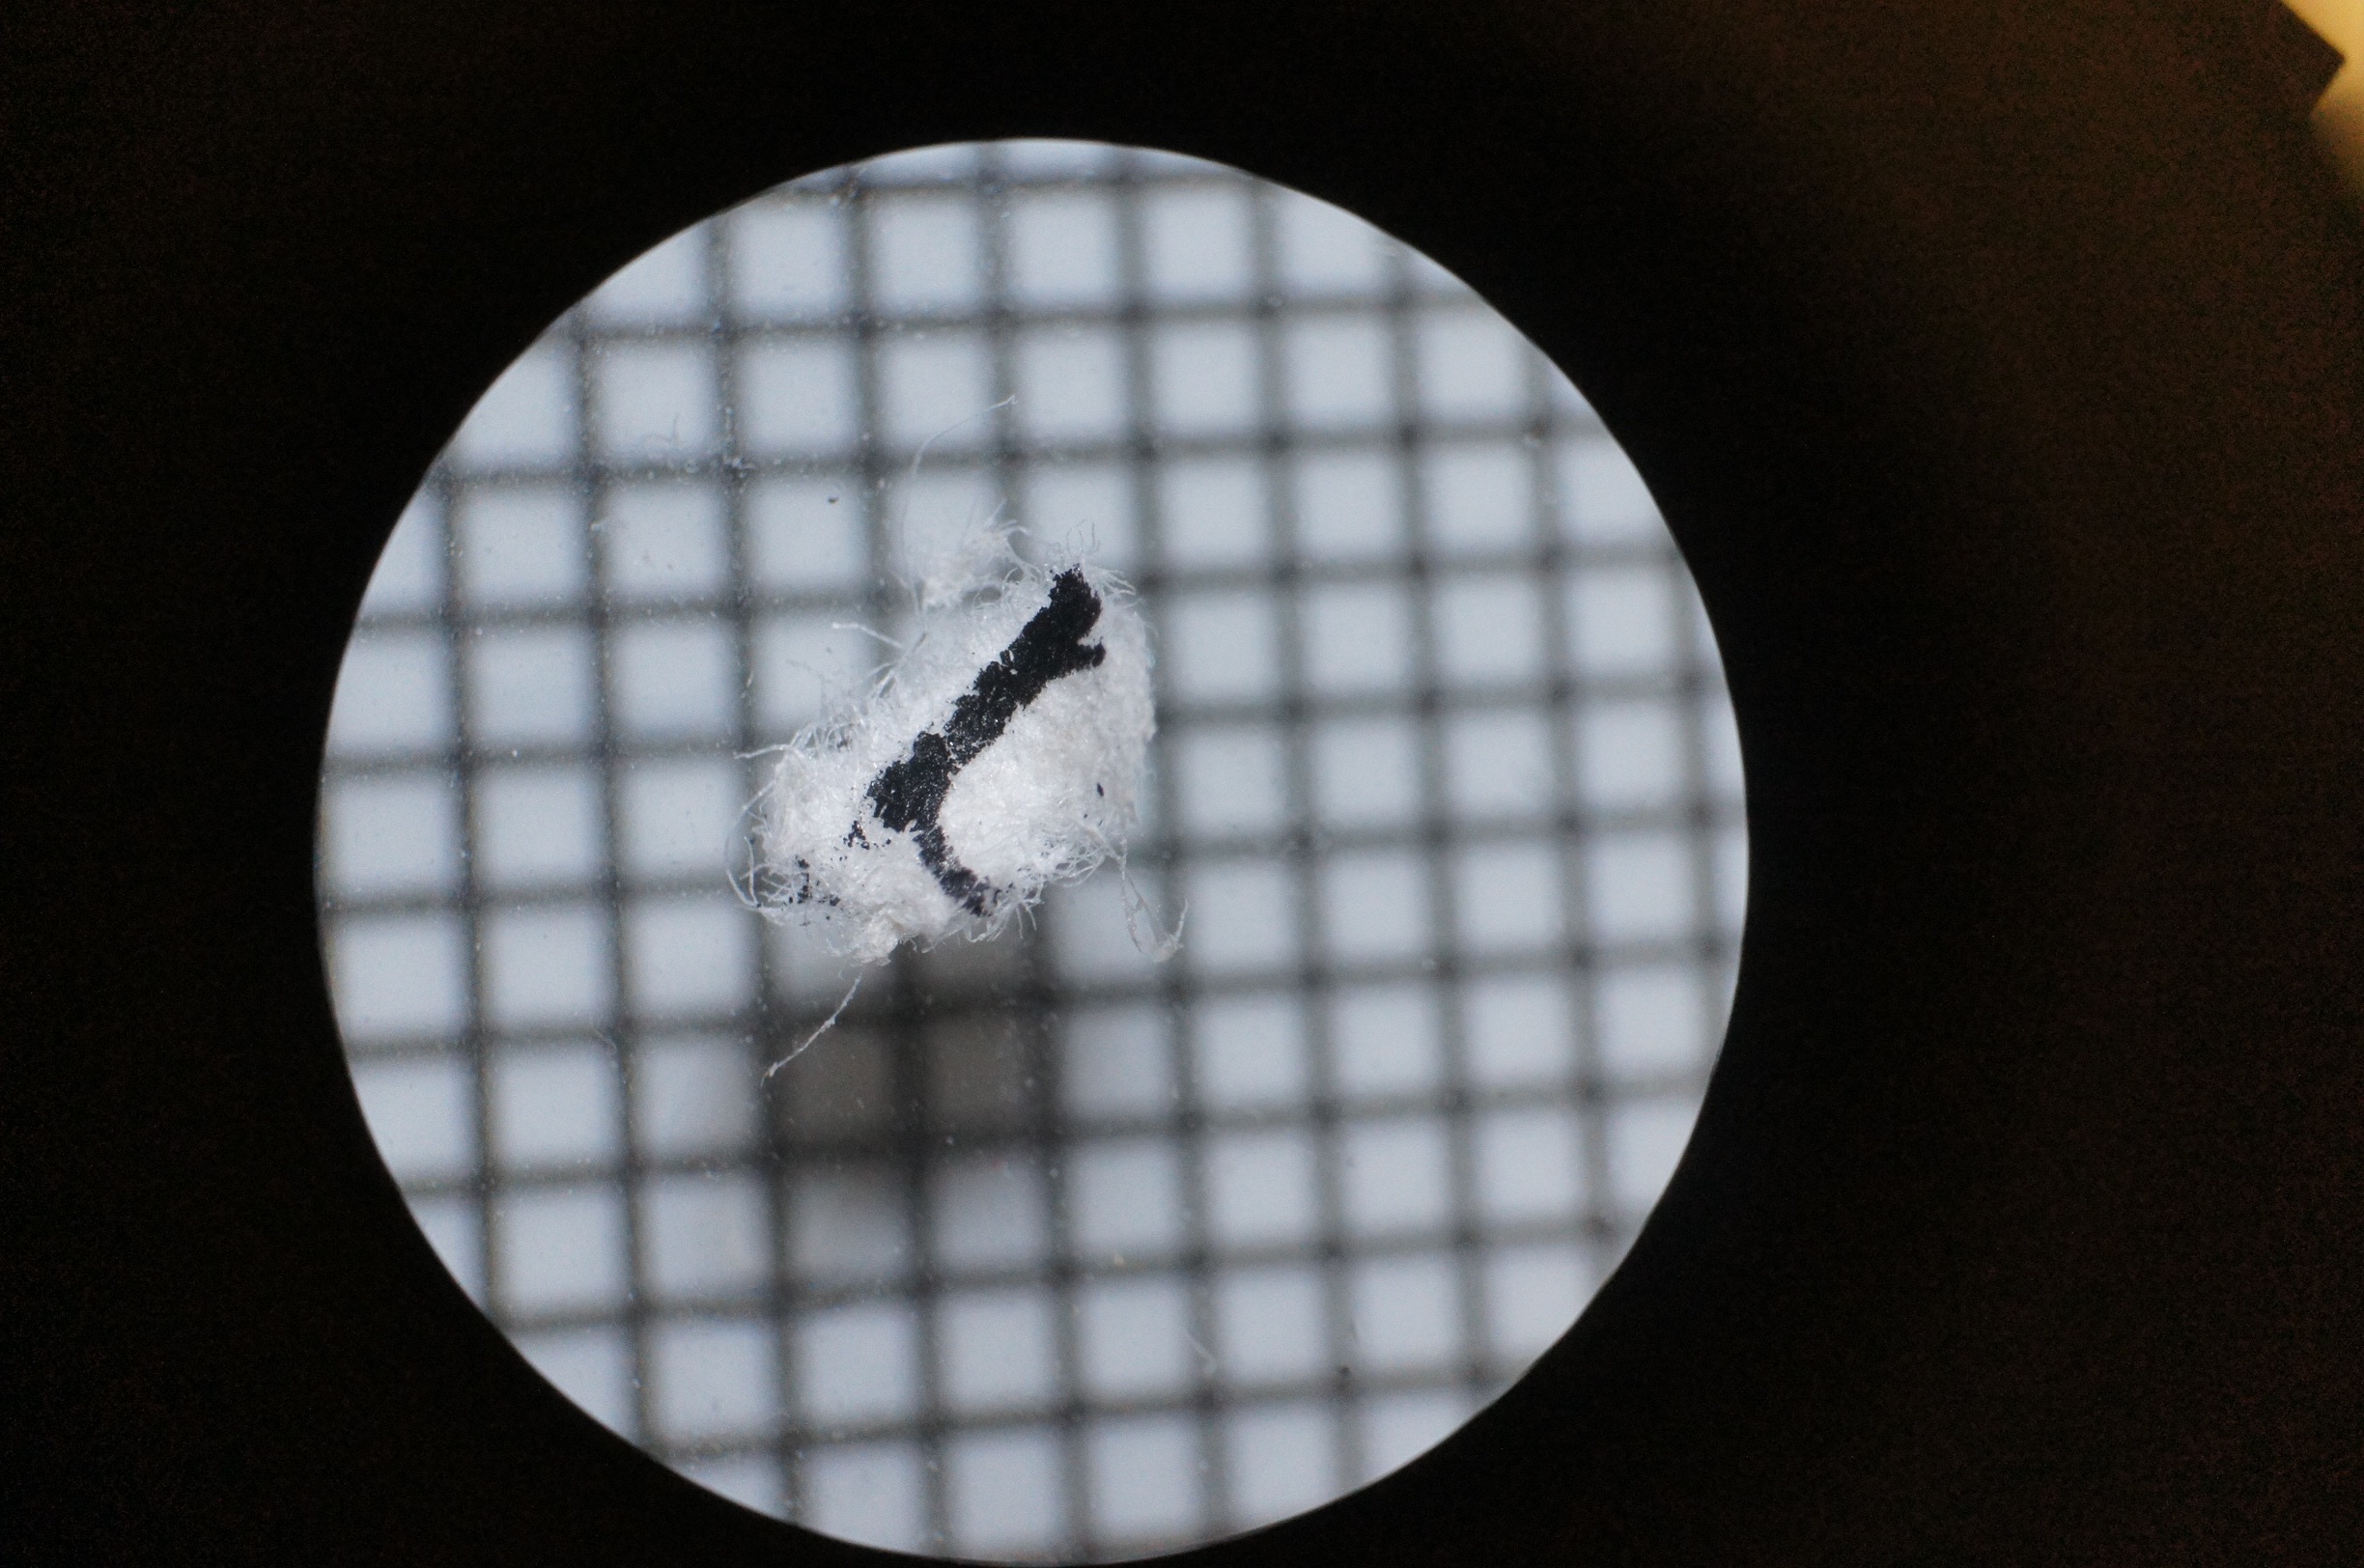
Flip it over. One side can look different from the other. Look at its edges– are they frayed like cotton, or more like fishing line? Is the thin edge of a fragment a brighter colour than the sides? This might be due to a recent fragmentation of a plastic. In this image, the other side made it clear this was a rock, not plastic.

Analyze its textures. Do you see cellular structures that indicate it’s a plant, or terracing that indicate it’s a rock? Are the edges drawn out in little strings like a stretched out plastic bag, or are they fibrous like a plant? Is it spherical with a “belly button” or pockmark that indicates it’s a seed? The regular, uneven patterns here indicate cellular plant structures.
Listen to it. Using the tweezers, tap the items to hear how they sound against the glass or plastic slide. Rocks and glass make a higher-pitched sound than many plastic fragments, and organics make a lower-pitched sound.
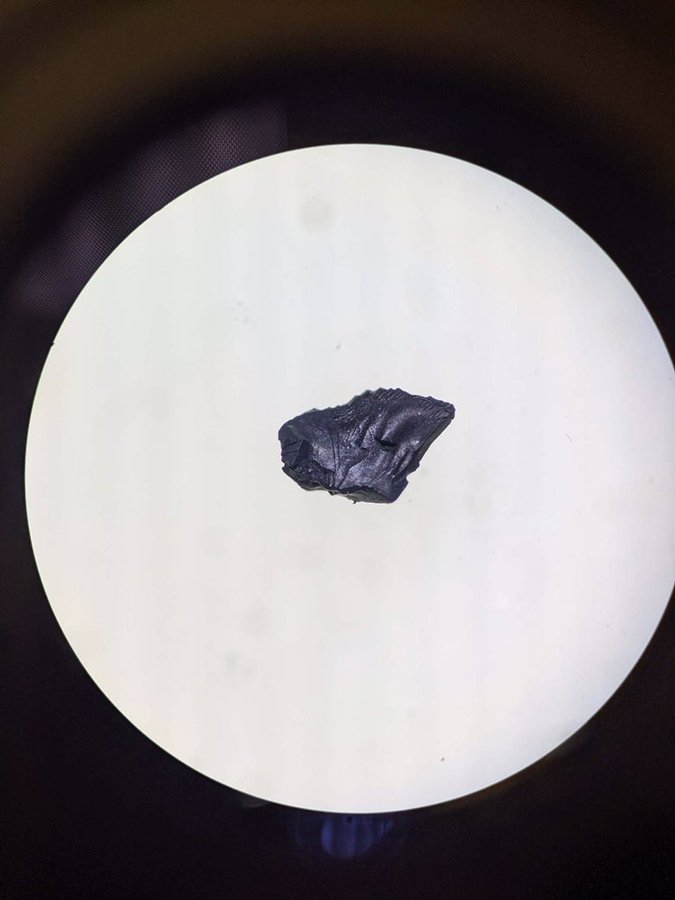
This tire crumb (fragment from a car tire) makes no noise when you tap it. Other fragments make sharp noises.
See how it moves. Plastics move differently in water, breezes, and static fields than other materials. If you introduce water, breeze, or static, be sure that the sample doesn’t escape!
There are some steps where you can destroy part of the sample.
Cut it. When you cut it open, look at the inside compared to the outside. If it is brighter inside, it is more likely to be plastic that has been in the weather for a while. If it is hollow, it is more likely to be an exoskeleton, grass, seed, or egg. If there are cellular structures, it is more likely to be a plant.
Use a hot needle test. First, measure and weigh the sample (see below), since this will destroy the sample. Put the end of a needle in the flame of a lighter until it glows (protect your fingers!). Touch the end of the needle to the plastic, ideally under a microscope. If the item shrinks away, melts, divets, or burns black, it is likely plastic. If it smolders and goes out or burns cleanly, it is more likely organic. If it does not burn, it is more likely glass or a rock.
What kind of plastic is it (morphologies and sources)
There are different forms (morphologies) of plastics and each one corresponds to a different source of plastics. These are the same terms we use in peer-reviewed, scientific articles.
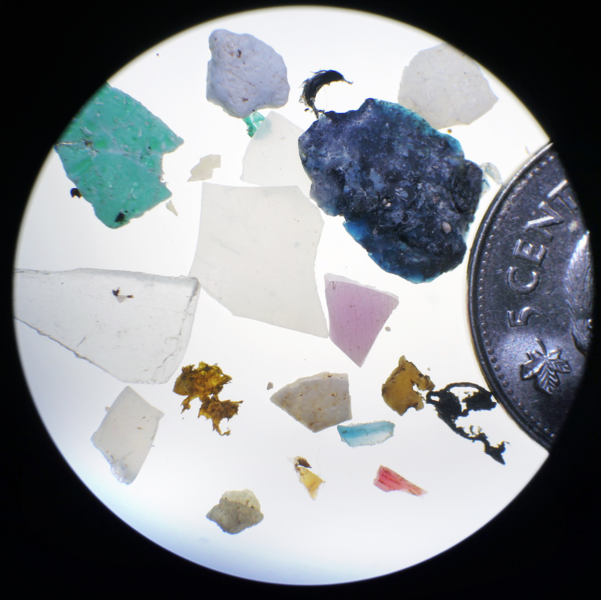
Fragments. Fragments are one of the most common types of plastics you’ll find in a marine sample. They come off of larger items. They can have sharp or rounded edges, depending on how long they’ve been in the environment. Fragments are hard or stiff, even if they are also very thin (think of a fragment from a plastic milk jug, for example, which would be thin but stiff).
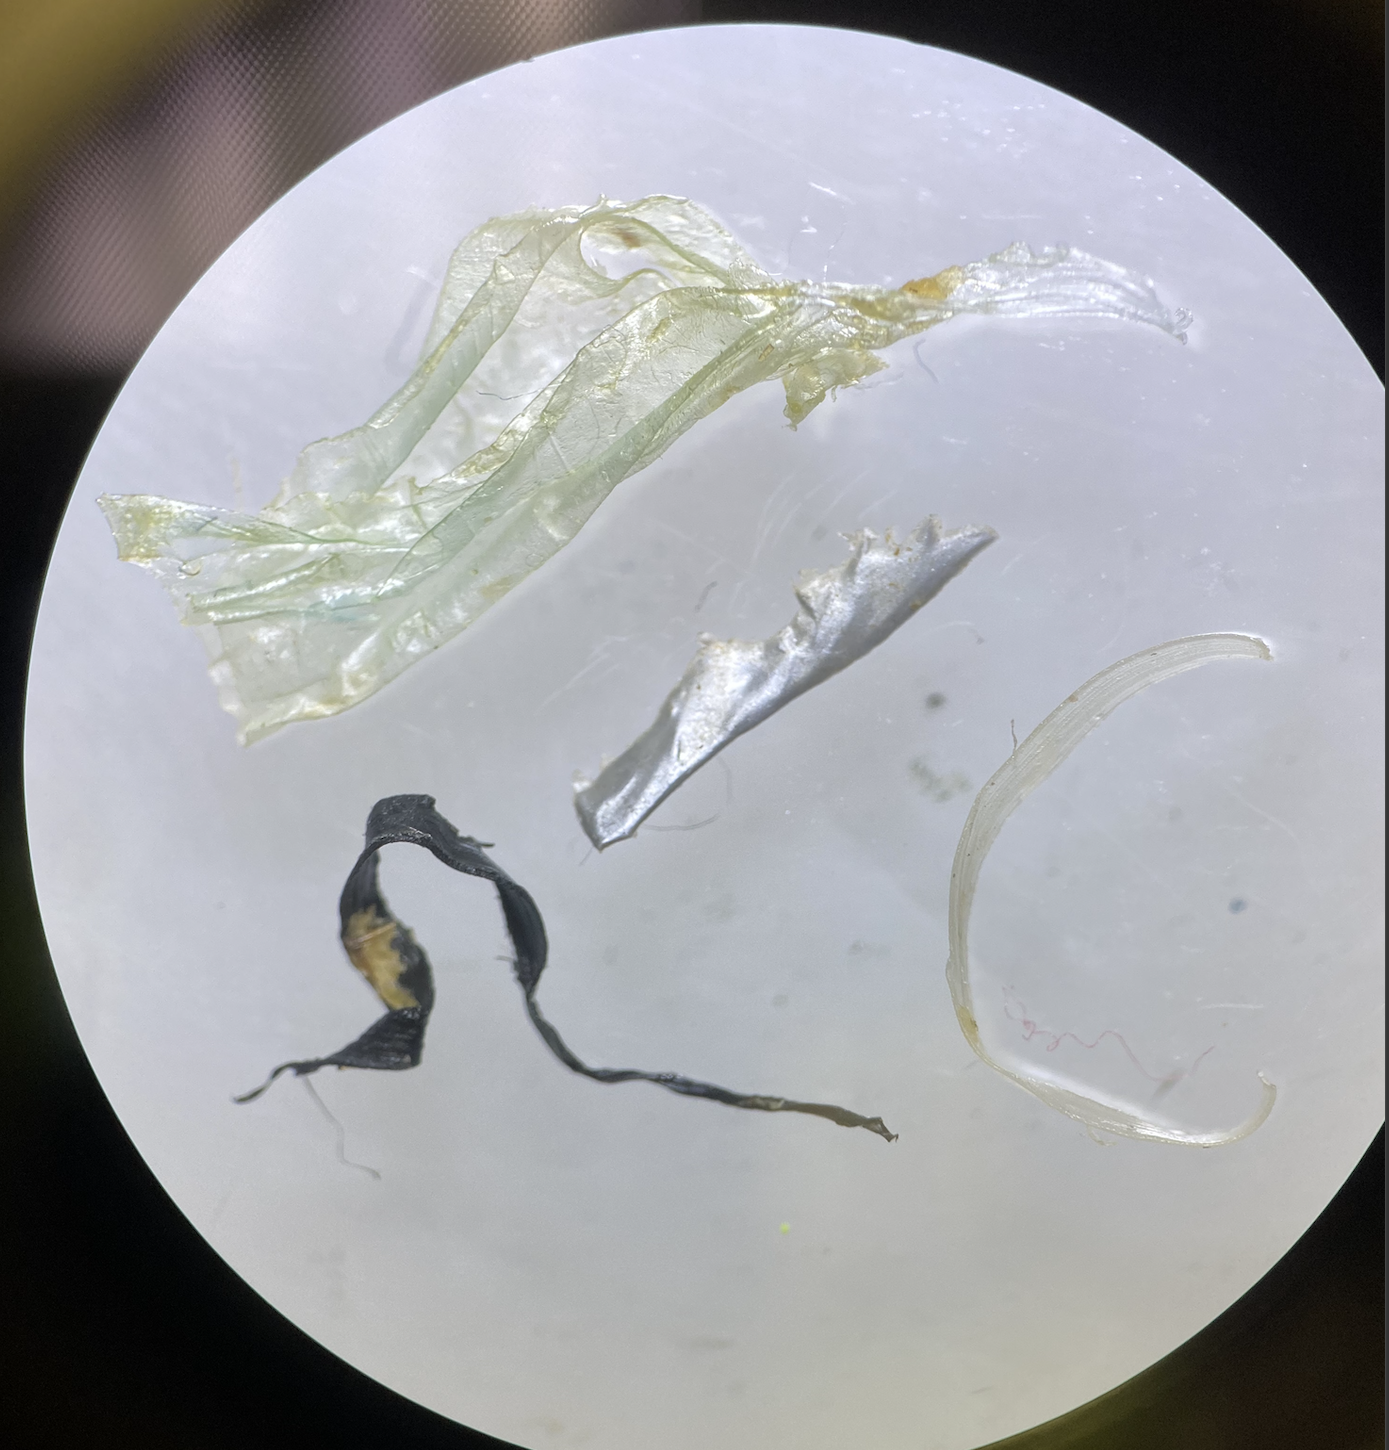
Film plastics, sometimes called sheet plastics, are like plastic bags or plastic wrap. They are very thin and flexible, and come from many sources: consumer (carrier bags), industrial (ag bags, feed bags), construction (Tyvek sheeting), and commercial (pallet wrapping). It is quite rare to find film plastics in marine samples because the strength of the ocean shreds them into nanoplastics beyond what you can see. They are more common in rivers, lakes, and near shorelines.

Foam plastics have air as part of their structures and are very light and fragment easily. They are squishy when you press on them. You’re likely familiar with the brand name Styrofoam, which is one type of foam plastics. It is common to find little white beads from larger foam objects, but you can also find foam more similar to upholstery foams.
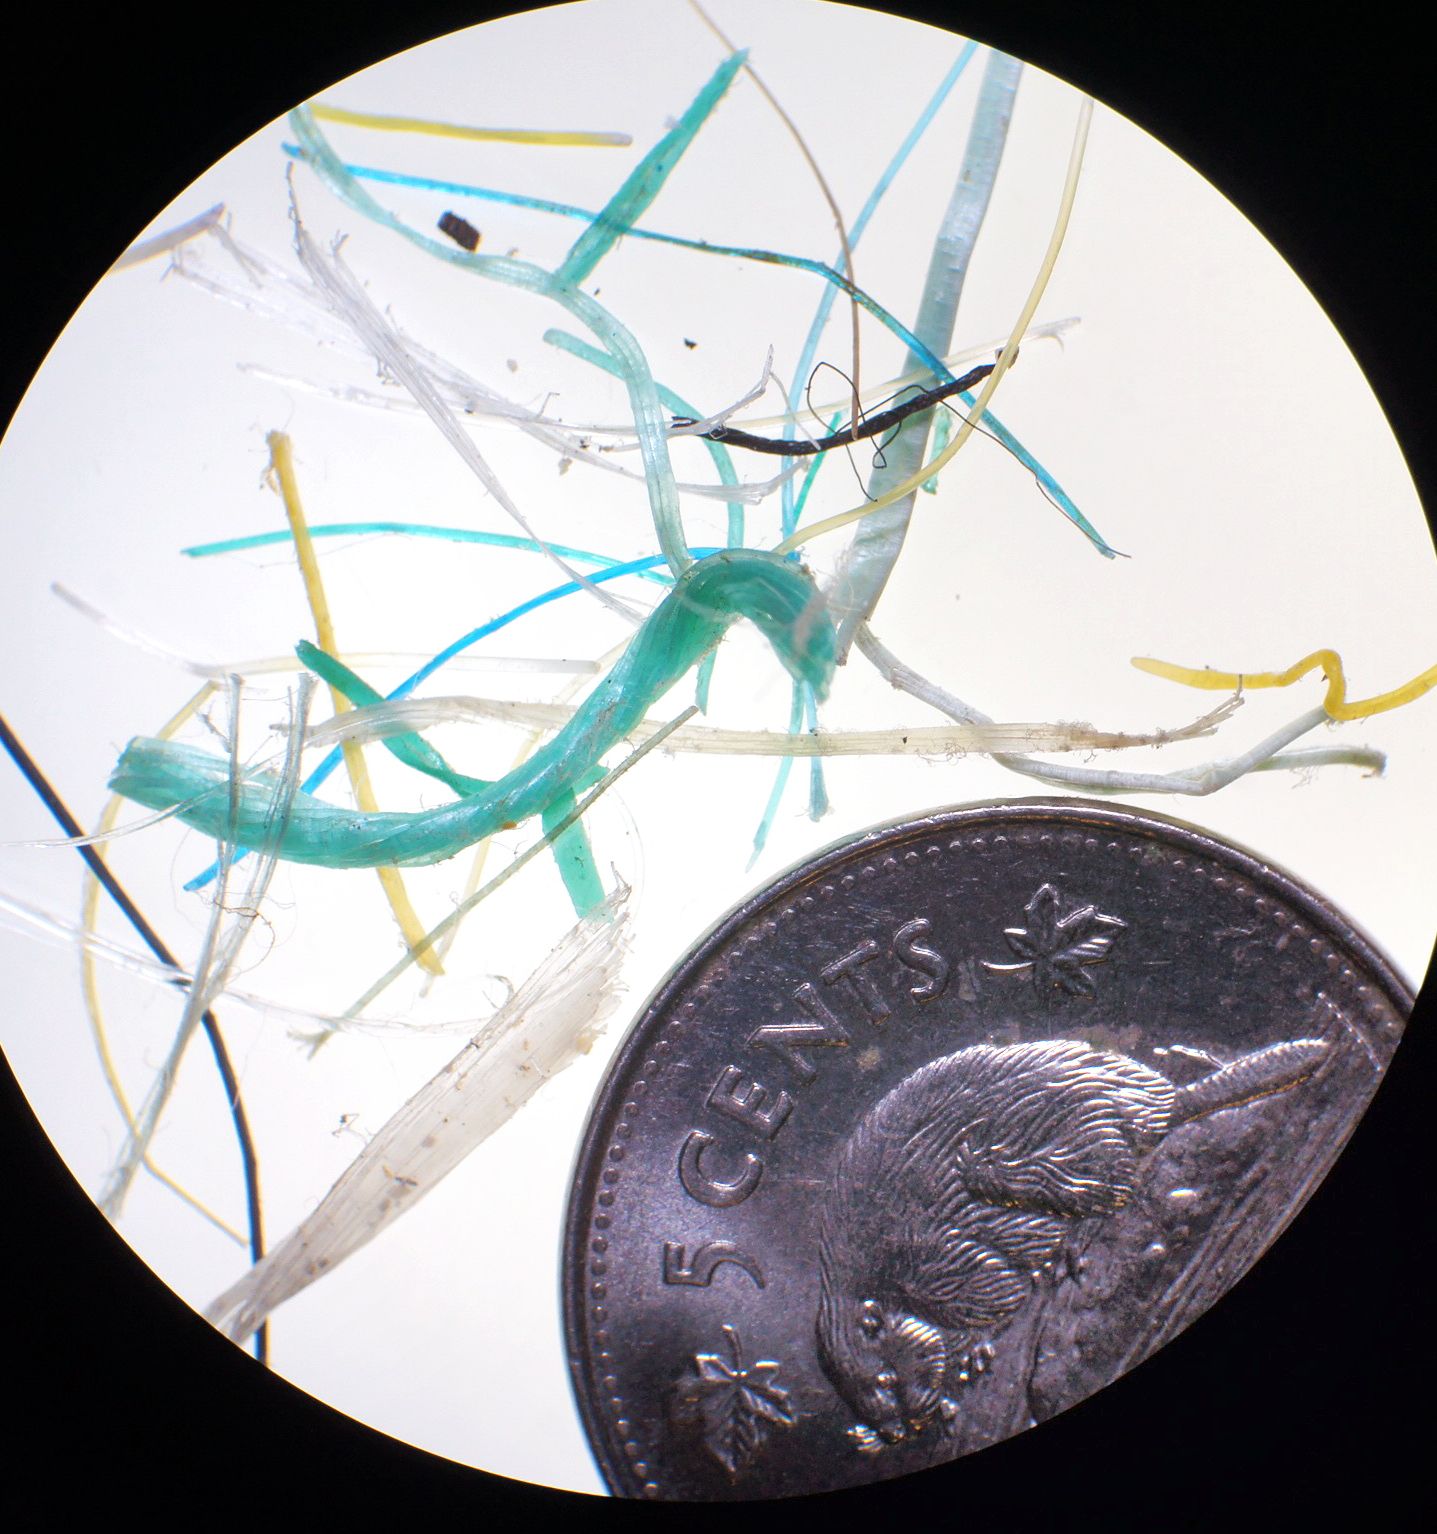
Threads are strands of plastic, usually from fishing line, though they can also be from mesh bags, pressed composites like fiberglass, cigarette butts, and other sources. They are sturdy though flexible, and can fray at the ends. They are usually smooth along their length, though some pitting and fraying can occur. They are much thicker and sturdier than microfibres.
Microfibres come from synthetic textiles. They are the size of dust! They are usually kinked or wiggly. These are very common in a variety of aquatic environments, but they are also common in indoor environments and can easily contaminate your sample, making you assume that something that fell off your clothes or out of the air is from the water. These plastics are the main reason we use contamination controls during trawling. If you created a control then, compare what is in the control with what is in your sample and ignore (eliminate) anything that appears in both.

Microbeads come from personal care products and are common in waters that have sewage outflows in them. They can be in a range of sizes, but most are brightly coloured (like the sparkly one in the image, which we assume came from sparkly toothpaste). Most are perfectly round, but many are deformed as if they are half melted. They are much, much smaller than industrial pellets (below).
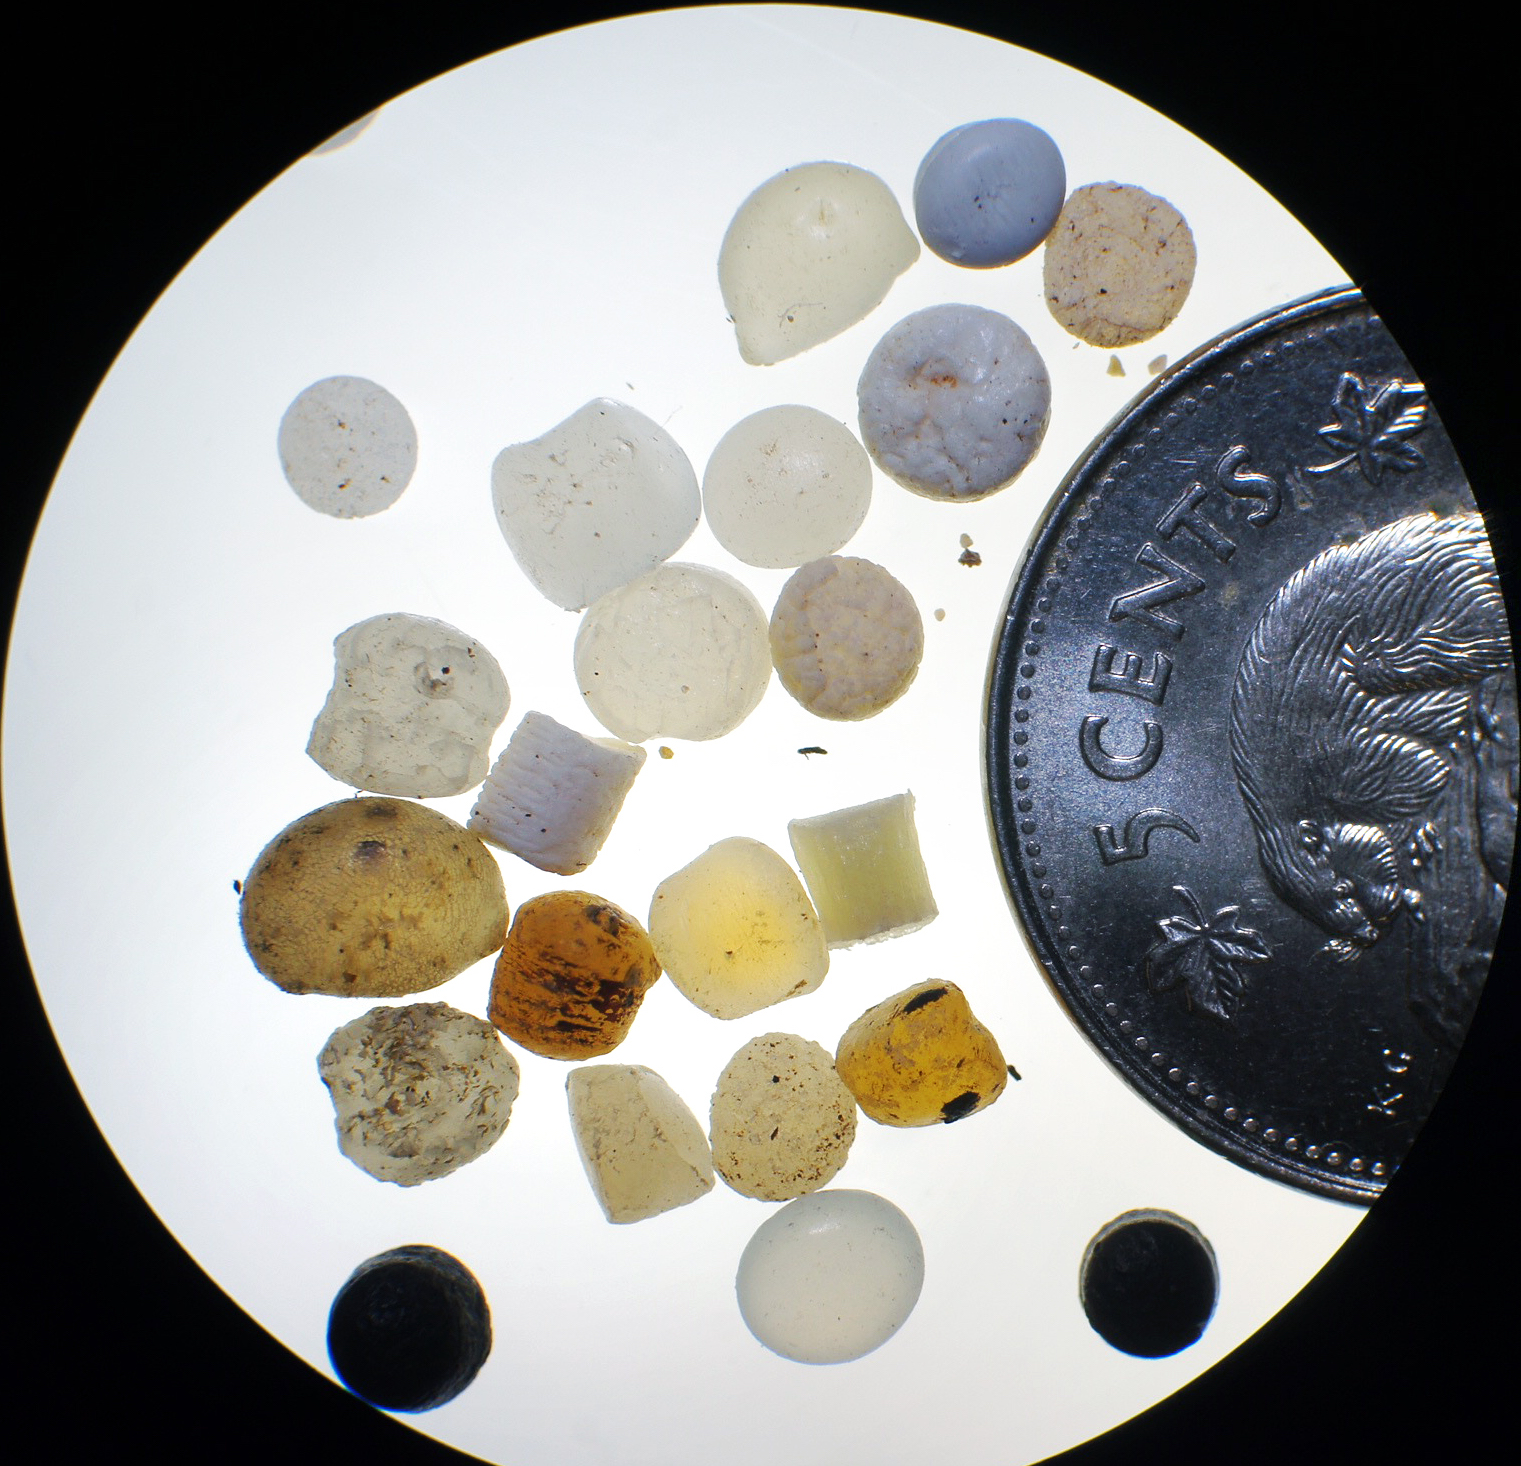
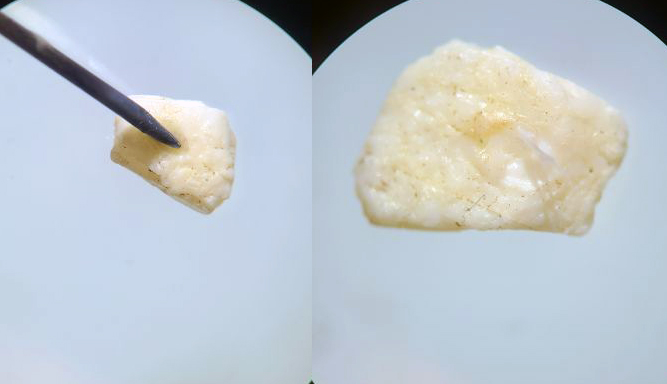
Industrial pellets, also called nurdles or production pellets, are the raw feedstock for manufacturers who make plastic items. These small plastics are shipped around the world, and many enter the ocean during shipping or transfer. They are spherical but are usually oddly squished like a bead. Most of the time they are white or clear, but we have found them in all sorts of colours, including bright purple. The longer a pellet is in the ocean, the more contaminants it collects, staining it a tea/coffee/tobacco colour, like old teeth.
Analyzing the sample as a whole
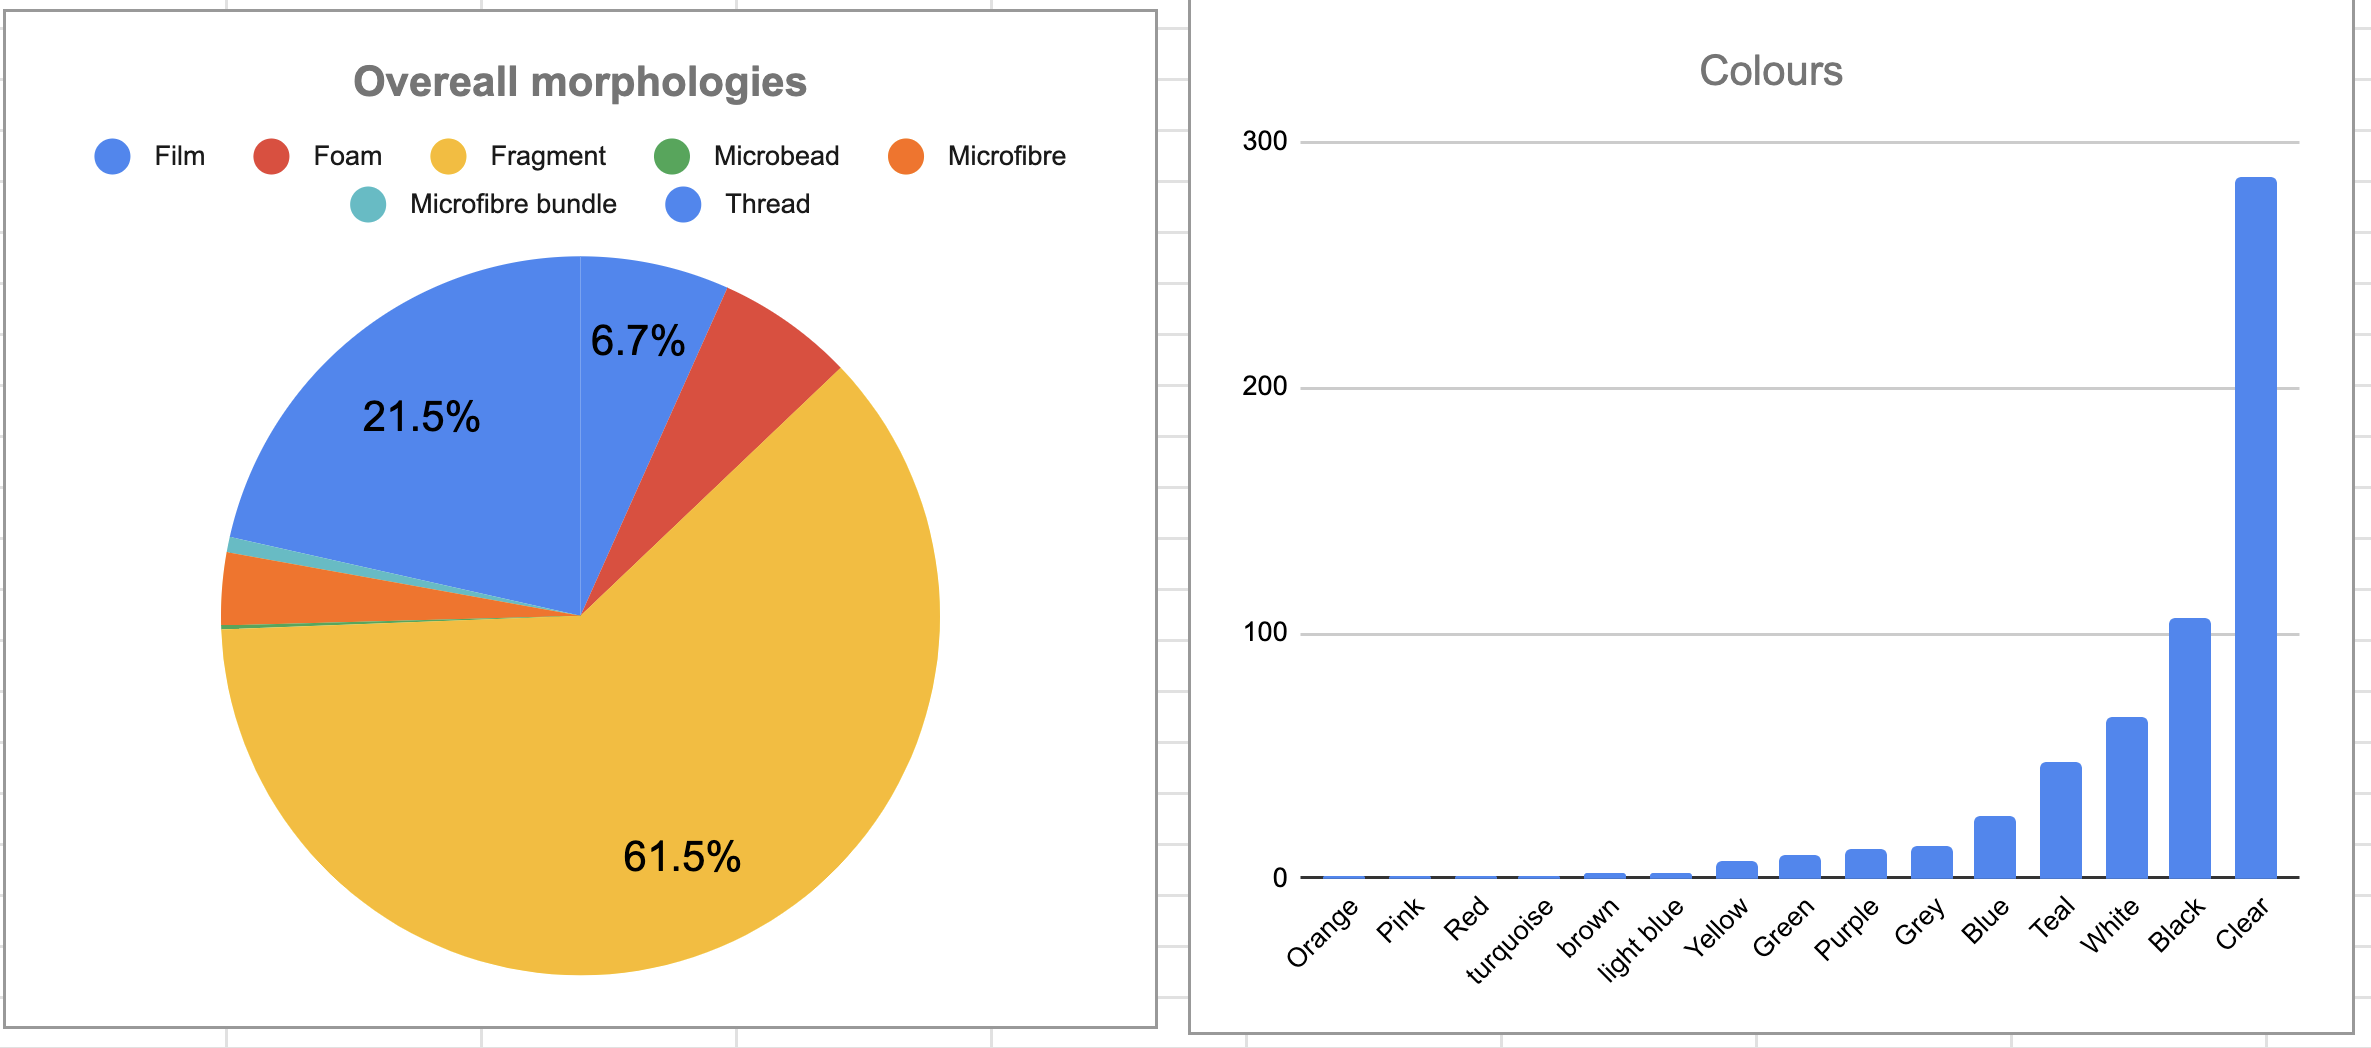
What characterizes plastics in the area you sampled? Use your datasheet to summarize your entire sample. You can show the relative ratios of morphologies, erosion patterns, colours, sizes, weights, and other characteristics of the plastics. Each area has a different plastic profile that reflects its local and distant sources of plastics. If you have specific research questions, see the post on designing a study using BabyLegs.
Some possible summary forensics:
- Most marine plastics worldwide are microplastics (smaller than 5mm in size) and fragments (or microfibres, but BabyLegs is unlikely to capture these very, very tiny plastics). If your sample is mostly microplastics and fragments (60-80%), you have a pretty average sample
- If you have a number of foams and film plastics that are intact, or a lot of plastics larger than 5mm, then your plastics are likely local in origin. The ocean tends to shred plastics into microplastics quickly, especially the more fragile film and foam plastics.
- If you have a high number of thread plastics, you have fishing activities contributing to your local plastic pollution issue
- If you have a high number of microbeads or snarls of microfibers (called microfibre bundles), as well as any tampon applicators, condoms, or little plastic pill casings, then you likely have a sewage outfall nearby (wash your hands!)
- If you have a number of pellets, then you may be near an industrial area or on a major shipping route for industry
- If you have a high number of fragments and pellets and they tend to be very discoloured (either tobacco coloured pellets or bleached fragments), almost no films or foams, and the pieces are highly eroded (lots of scratches, dents, and frays) then you likely have a lot of long-range plastics that come to your waters from very far away
- If you did multiple trawls in different locations, compare the sub-totals to one another to see if there are different profiles in different places that can tell you about potential local sources of plastics